
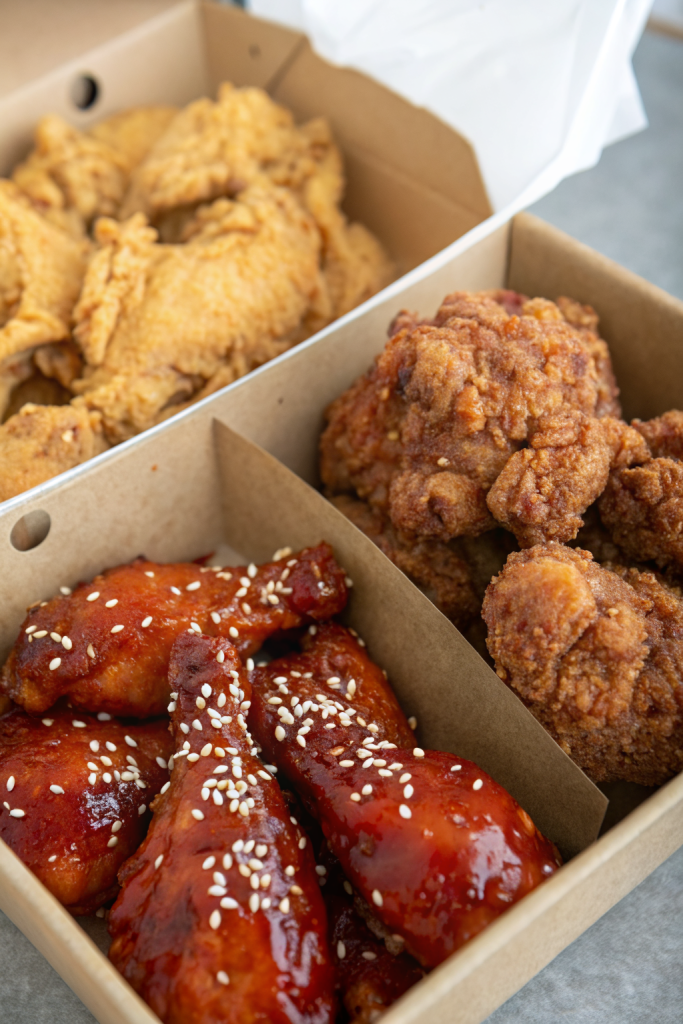
Korean Fried Chicken Recipe hits every craving at once: shatteringly crisp crust, juicy meat, and a sticky-sweet-spicy glaze that clings to every nook. It works for busy weeknights or game day, and you can finish a batch in about 45 to 60 minutes total. I still remember burning my fingers on the first batch I tested at home because I refused to wait for it to cool.
Why Korean Fried Chicken Recipe Is Worth It
Korean Fried Chicken Recipe uses a thin, starchy coating and double frying, so the crust stays insanely crisp under the sauce. The glaze balances gochujang heat, garlic, and sweetness, so every bite hits salty, spicy, and slightly smoky notes.
You can pull this off with basic pantry items plus a few Korean staples from any decent grocery store. Cleanup stays manageable, and the recipe scales easily for a crowd or a solo late-night snack.
“This Korean Fried Chicken Recipe tastes better than takeout and stays crispy even after saucing, which feels slightly dangerous for my self-control. ★★★★★”
Ingredients You Need
Chicken
- 2 pounds chicken wings or drumettes
- Use a mix of flats and drumettes for texture.
- You can also use boneless skinless thighs cut into 1.5 inch chunks.
Marinade
- 1 teaspoon kosher salt
- 1 teaspoon black pepper
- 1 tablespoon soy sauce
- 1 tablespoon rice vinegar or apple cider vinegar
- 1 tablespoon grated fresh ginger
- 3 cloves garlic, minced or grated
- 1 tablespoon mirin or a pinch of sugar plus 1 teaspoon water
Mix the marinade in a large bowl, then add the chicken and coat it well. This step seasons the meat and adds a little tang.
Coating
- 1 cup potato starch or cornstarch
- Potato starch gives the crispiest crust, but cornstarch still works well.
- 3 tablespoons all purpose flour
- 1 teaspoon baking powder
- 1 teaspoon kosher salt
- 1 teaspoon garlic powder
- 1 teaspoon onion powder
You can skip the flour and use all starch if you need a lighter coating. Baking powder helps the crust puff and crunch.
Sauce (Yangnyeom-style glaze)
- 2 tablespoons unsalted butter or neutral oil
- 3 cloves garlic, minced
- 2 tablespoons gochujang (Korean red chili paste)
- I like brands such as Chung Jung One or CJ Haechandle for balanced heat.
- 2 tablespoons ketchup
- 3 tablespoons soy sauce
- 3 tablespoons honey or light corn syrup
- 2 tablespoons brown sugar
- 1 tablespoon rice vinegar
- 1 teaspoon toasted sesame oil
- 1 to 2 teaspoons gochugaru (Korean chili flakes), to taste
- 2 tablespoons water, plus more as needed to thin
Taste the sauce and adjust sweetness or heat. Add more honey for sticky sweetness or more vinegar for tang.
Garnishes
- 2 tablespoons toasted sesame seeds
- 2 green onions, thinly sliced
- Optional: thinly sliced fresh red chili for extra heat and color
Oil and Equipment
- 4 to 6 cups neutral oil with high smoke point
- Use canola, peanut, or vegetable oil.
- Heavy-bottomed pot or Dutch oven
- Wire rack set over a sheet pan
- Tongs or chopsticks
- Instant-read thermometer
- Medium saucepan for the sauce
- Large mixing bowls
Quick Tips & substitutions
- Pat the chicken very dry before marinating to help the coating cling.
- Marinate at least 20 minutes; aim for 2 hours in the fridge for deeper flavor.
- Use potato starch if possible; it gives the crunchiest Korean Fried Chicken Recipe texture.
- Keep the coating mixture dry; do not add liquid or it turns gummy.
- Toss chicken in the starch mixture right before frying to avoid soggy clumps.
- Fry in small batches so the oil temperature stays around 325 to 350°F.
- Double fry: first fry cooks the chicken, second fry crisps and deepens color.
- Thin the sauce with a splash of water if it looks too thick to coat evenly.
- Skip gochugaru and reduce gochujang for kids or heat-sensitive friends.
- Use gluten-free tamari and all starch instead of flour for a gluten-free version.
How to Make Korean Fried Chicken Recipe
Step 1: Prep and marinate the chicken
Place the chicken pieces in a large bowl. Add salt, pepper, soy sauce, rice vinegar, ginger, garlic, and mirin. Toss until every piece looks coated, then cover and chill for 20 minutes to 2 hours.
Pull the chicken from the fridge about 10 minutes before coating so it loses the chill a bit. Line a sheet pan with a wire rack for the coated chicken.
Step 2: Mix the coating
In another large bowl, whisk potato starch, flour, baking powder, salt, garlic powder, and onion powder. Taste a pinch of the dry mix so you know the seasoning level. Adjust salt if needed.
Work with a few pieces of chicken at a time. Lift them from the marinade, let excess drip off, then toss in the starch mixture until every piece looks fully coated and slightly clumpy.
Step 3: Heat the oil
Pour oil into your heavy pot, leaving a few inches of space at the top. Clip on a thermometer and heat the oil to 325°F over medium heat. Keep the heat steady and adjust the burner so the temperature holds.
Place the wire rack over a sheet pan near the stove. This setup keeps the crust crisp instead of soggy from paper towels.
Step 4: First fry
Add a few chicken pieces to the hot oil, one at a time, without crowding. The temperature may drop a bit, so adjust the heat to keep it near 300 to 325°F. Fry wings for about 6 to 8 minutes, or boneless thigh pieces for about 4 to 6 minutes, until the coating looks pale golden and set.
Lift the chicken with tongs and place it on the wire rack. Repeat with the remaining chicken, letting the oil come back to temperature between batches.
Step 5: Rest and crank the heat
Let the fried chicken rest on the rack for at least 5 minutes. Increase the heat under the pot and bring the oil to 350 to 375°F. This hotter oil gives the crust that signature Korean Fried Chicken Recipe crunch.
Check that the chicken feels firm and partially cooked through. The second fry will finish the texture.
Step 6: Second fry for extra crunch
Return a batch of chicken to the hotter oil. Fry for 2 to 3 minutes, until the pieces look deep golden and very crisp. The bubbles will get smaller as moisture cooks off.
Transfer the chicken back to the wire rack and repeat with the remaining batches. Let the chicken rest while you prepare the sauce.
Step 7: Make the sauce
Set a medium saucepan over medium-low heat and add butter or oil. When it melts and shimmers, add garlic and cook about 30 seconds until fragrant. Stir in gochujang, ketchup, soy sauce, honey, brown sugar, rice vinegar, sesame oil, gochugaru, and water.
Simmer for 2 to 3 minutes, stirring, until the sauce thickens slightly and looks glossy. Taste and adjust with more honey, vinegar, or chili flakes as you like.
Step 8: Coat the chicken
Place the fried chicken in a large clean bowl. Pour some of the hot sauce over the chicken and toss quickly with tongs until every piece looks coated. Add more sauce as needed; you want a shiny glaze, not a soup.
Sprinkle with toasted sesame seeds and sliced green onions. Serve right away while the crust still crackles.
Recipe Variations
- Gluten-free: Use all potato starch or cornstarch in the coating and swap soy sauce for gluten-free tamari.
- Extra spicy: Add more gochujang and gochugaru, plus a pinch of cayenne in the coating.
- Mild version: Cut the gochujang in half and skip gochugaru; add more ketchup and honey for a sweeter glaze.
- Boneless bites: Use boneless thighs or breast, cut into 1 inch chunks, and reduce frying time slightly.
- Soy garlic style: Skip gochujang and gochugaru; use more soy sauce, garlic, and honey for a sticky soy garlic Korean Fried Chicken Recipe.
- Oven or air fryer: Coat the chicken, spray lightly with oil, and cook in a hot oven or air fryer, then toss in the sauce.
Ways to Serve Korean Fried Chicken Recipe
- Pile on a platter with toothpicks and serve as a party appetizer.
- Pair with steamed white rice and kimchi for a simple meal.
- Serve with pickled radish cubes and crunchy lettuce for contrast.
- Tuck pieces into lettuce wraps with rice and sliced cucumber.
- Add to a rice bowl with shredded cabbage, carrots, and extra sauce.
- Use leftovers in a tortilla or flatbread with slaw for a fun fusion wrap.
Storage Success
Cool leftover Korean Fried Chicken Recipe completely before you store it so condensation does not wreck the crust. Place pieces in an airtight container and keep them in the fridge for up to 3 days. Reheat in a hot oven or air fryer until the coating crisps again and the chicken warms through. Keep the sauce separate when possible and toss just before serving for the best texture.
Leave a Reply