

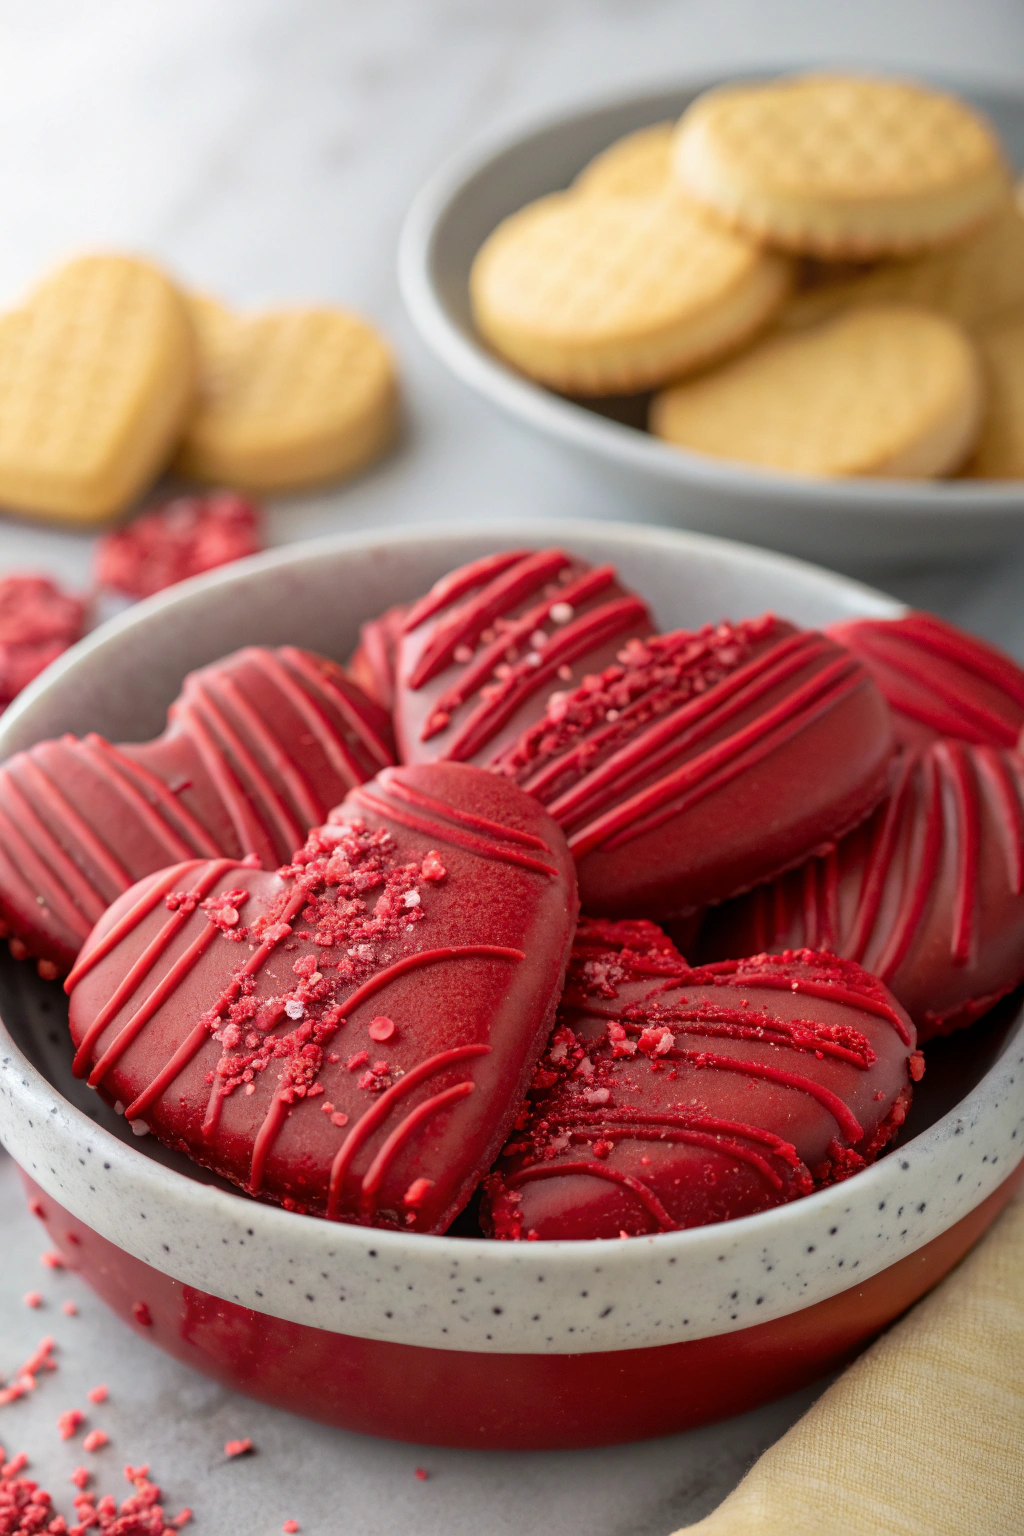
Crisp and Buttery Danish Biscuits with Chocolate Dip taste like a cross between shortbread and a bakery-style butter cookie, with a glossy chocolate edge that snaps when you bite in. They suit holiday cookie trays, coffee breaks, and “I just need something fancy in under an hour” cravings, since they take about 45 minutes start to finish. I first baked a batch to impress my very picky neighbor, and he now “checks on me” every time he smells butter in the hallway.
Why Crisp and Buttery Danish Biscuits with Chocolate Dip Is Worth It
These Danish-style butter biscuits feel fancy, yet the method stays simple and reliable. You mix one bowl of dough, pipe or shape it, bake, then dip in chocolate, and you suddenly own a cookie that looks like it came from a tin your grandma guarded with her life.
The texture hits that perfect balance: crisp edges, tender centers, and a deep buttery flavor that pairs perfectly with dark chocolate. They stack well, travel well, and keep their crunch, which makes them ideal for gifting or stashing in a secret cookie tin you pretend you “forgot” on the top shelf.
“These Crisp and Buttery Danish Biscuits with Chocolate Dip taste like something from a high-end European bakery. The edges stay crisp, the centers melt in your mouth, and the chocolate dip turns them into a show-off cookie that still feels comforting and homey.”
Ingredients You Need
Biscuit Dough
- Unsalted butter, softened – Use good-quality European-style butter if possible; the higher fat content gives richer flavor and better crumb.
- Granulated sugar – Regular white sugar keeps the biscuits crisp.
- Powdered sugar – A little powdered sugar adds tenderness and that melt-in-your-mouth bite.
- Large egg – Use room-temperature eggs so the dough mixes smoothly.
- Vanilla extract – Pure vanilla tastes best; avoid imitation if you can.
- Almond extract (optional) – A tiny splash gives that classic Danish cookie-tin flavor.
- All-purpose flour – Standard unbleached flour works great; measure with the spoon-and-level method to avoid dense biscuits.
- Fine sea salt – Balances the sweetness and sharpens the buttery notes.
- Cornstarch – Helps the biscuits hold their shape while staying tender.
- Whole milk or heavy cream – Loosens the dough just enough for piping; add a teaspoon at a time.
Chocolate Dip
- Dark or semisweet chocolate chips or chopped bars – Use 55–70% cocoa for a balanced dip; chocolate chips work, but chopped bars melt smoother.
- Neutral oil or coconut oil – A teaspoon or two thins the chocolate and gives a nice shine.
- Flaky sea salt (optional) – Sprinkle a tiny pinch on the chocolate for a bakery-style finish.
Pantry Shortcuts & Sub Notes
- Use salted butter if that’s what you keep on hand; just reduce added salt slightly.
- Swap half the vanilla with lemon zest for a brighter, more Scandinavian vibe.
- Use good-quality baking chocolate discs if you want the smoothest, glossiest chocolate dip without tempering.
Equipment List
- Stand mixer with paddle attachment or a sturdy hand mixer
- Mixing bowls
- Rubber spatula
- Piping bag with a large open star tip (like Wilton 1M or Ateco 826)
- Baking sheets
- Parchment paper or silicone baking mats
- Cooling rack
- Small heatproof bowl and saucepan (for melting chocolate) or microwave-safe bowl
- Kitchen scale (optional but very helpful for consistent results)
Quick Tips & substitutions
- Soften butter until it yields easily to a finger press but does not look greasy or melted.
- Beat butter and sugars long enough to look light and fluffy; this step builds structure and crunch.
- Add flour on low speed and stop mixing as soon as no dry streaks remain to avoid tough biscuits.
- If the dough feels too stiff to pipe, mix in milk or cream one teaspoon at a time until it pipes smoothly but still holds ridges.
- If you do not own a piping bag, roll the dough into small logs or press with a fork like shortbread; the flavor stays the same.
- Use gluten-free all-purpose baking blend (cup-for-cup style) for a gluten-free version; add 1 extra tablespoon of milk if the dough feels crumbly.
- Swap butter with a high-fat vegan butter stick for a dairy-free version; avoid soft tub margarine since it spreads too much.
- Chill piped biscuits on the tray for 15–20 minutes before baking if your kitchen runs warm; this step helps them keep their shape.
- Melt chocolate slowly and stir often so it stays smooth; if it thickens, stir in a few drops of oil.
- Dip only one end or one side of each biscuit so fingers stay clean and the chocolate sets faster.
How to Make Crisp and Buttery Danish Biscuits with Chocolate Dip
Step 1: Mix the butter and sugars
Beat softened butter, granulated sugar, and powdered sugar in a large bowl with a mixer on medium speed. Keep mixing until the mixture turns pale and fluffy, about 3–4 minutes, and scrape down the bowl once or twice. This step traps air in the dough and gives the biscuits their light, crisp texture.
Step 2: Add egg and flavorings
Crack in the egg and beat until it fully blends and the mixture looks smooth and slightly thick. Mix in vanilla extract and almond extract if you use it. Scrape the bowl again so no streaks of egg or butter hide at the bottom.
Step 3: Add dry ingredients
Whisk flour, cornstarch, and fine sea salt in a separate bowl. Add the dry mixture to the butter mixture in two additions on low speed. Mix only until the flour disappears and the dough looks thick and smooth; stop before it turns dense or sticky.
Step 4: Adjust dough for piping
Check the consistency by scooping a little dough into your piping bag and trying a test swirl on parchment. If the dough feels too stiff and tears instead of flowing, beat in 1 teaspoon of milk or cream at a time. Aim for a dough that pipes smoothly but still holds sharp ridges from the star tip.
Step 5: Pipe the biscuits
Line baking sheets with parchment paper or silicone mats. Fill a piping bag fitted with a large open star tip and pipe rosettes, S-shapes, or simple straight lines, leaving a little space between each biscuit. Keep the size fairly small, about 2 inches, so they bake evenly and stay crisp.
Step 6: Chill briefly, then bake
Slide the trays into the fridge and chill the piped biscuits for 15–20 minutes. Heat your oven to 350°F (175°C) while they chill. Bake one tray at a time for about 10–14 minutes, until the edges turn light golden and the centers look set but not dark.
Step 7: Cool completely
Place the trays on a cooling rack and let the biscuits sit for 5 minutes. Transfer the biscuits directly to the rack and cool them completely before dipping in chocolate. The biscuits firm up as they cool, which gives you that crisp, buttery snap.
Step 8: Melt the chocolate
Place chopped chocolate or chocolate chips in a heatproof bowl. Set the bowl over a small saucepan with barely simmering water, making sure the bottom of the bowl does not touch the water, and stir until melted and smooth. Stir in 1–2 teaspoons of neutral oil or coconut oil to thin and shine the chocolate.
Step 9: Dip and decorate
Dip one end or one side of each cooled biscuit into the melted chocolate, then let the excess drip back into the bowl. Lay the dipped biscuits on parchment and, if you like, sprinkle a tiny pinch of flaky sea salt or finely chopped nuts over the chocolate. Let the chocolate set at room temperature or slide the tray into the fridge for 10–15 minutes to speed things up.
Step 10: Serve and enjoy
Arrange the Crisp and Buttery Danish Biscuits with Chocolate Dip on a plate or in a tin once the chocolate sets firm. Pair them with coffee, tea, or hot cocoa, and watch them vanish faster than you planned. Keep a few aside for yourself, because everyone suddenly “stops by” when they see these on the counter.
Recipe Variations
- Gluten-free: Use a cup-for-cup gluten-free flour blend and add 1 extra tablespoon of milk if the dough feels dry.
- Vegan: Swap butter with vegan butter sticks and use a flax egg (1 tablespoon ground flax + 3 tablespoons water, rested 5 minutes).
- Low sugar: Reduce sugar by 2–3 tablespoons and use a darker chocolate (70–80%) for the dip.
- Citrus twist: Add 1–2 teaspoons of lemon or orange zest to the dough and skip almond extract.
- Nutty version: Stir in very finely chopped toasted almonds or hazelnuts and press a few crumbs onto the chocolate dip.
- Spiced holiday batch: Add a pinch of cinnamon and cardamom to the flour mixture for a cozy, wintery flavor.
- Double chocolate: Mix mini chocolate chips into the dough and still dip in dark chocolate for extra richness.
Ways to Serve Crisp and Buttery Danish Biscuits with Chocolate Dip
- Serve with hot coffee, espresso, or a latte for a bakery-style afternoon break.
- Pair with black tea, chai, or herbal tea for a cozy evening snack.
- Crumble a few biscuits over vanilla or chocolate ice cream for a quick dessert.
- Pack them in small tins or bags as edible gifts for holidays, teachers, or neighbors.
- Set them on a dessert board with fresh berries and other cookies for parties or movie nights.
Storage Success
Cool the Crisp and Buttery Danish Biscuits with Chocolate Dip completely before you store them, or the steam will soften their crisp texture. Keep them in an airtight tin or container at room temperature for up to a week, and layer parchment between stacks so the chocolate does not smudge. If your kitchen runs warm, store the container in a cooler spot away from sunlight, or chill briefly and bring to room temperature before serving. Freeze undipped biscuits in a freezer bag for up to 2 months, then thaw and dip in fresh chocolate when you want a quick treat.
Crisp and Buttery Danish Biscuits with Chocolate Dip
Ingredients
Instructions
- Preheat the oven to 350°F (175°C). Line two baking sheets with parchment paper.
- In a mixing bowl, beat the softened butter and powdered sugar together until very light and fluffy, 3–4 minutes.
- Beat in the vanilla extract until combined.
- In a separate bowl, whisk together the flour, cornstarch, and salt. Add this to the butter mixture and mix on low speed just until a soft dough forms.
- Scoop or pipe the dough into small rounds or fingers onto the prepared baking sheets, spacing them about 2 inches apart.
- Bake for 12–15 minutes, or until the edges are just turning light golden and the centers are set.
- Allow the biscuits to cool on the baking sheet for 5 minutes, then transfer to a wire rack to cool completely.
- Place the chopped dark chocolate and oil (or butter) in a heatproof bowl set over a pot of gently simmering water, making sure the bowl does not touch the water.
- Stir until the chocolate is fully melted and smooth, then remove from heat and let cool slightly until thickened but still fluid.
- Dip one end of each cooled biscuit into the melted chocolate, letting any excess drip off.
- Place the dipped biscuits on parchment paper and allow the chocolate to set at room temperature or in the refrigerator for faster setting.
- Serve once the chocolate is firm. Store leftovers in an airtight container at cool room temperature.
Notes
Approximate per 1 biscuit (1 of 24): 110 calories; fat 7 g; saturated fat 4 g; carbohydrates 11 g; fiber 1 g; sugars 5 g; protein 1 g; sodium 30 mg. Values are estimates and will vary based on exact ingredients, chocolate type, and portion size.
Leave a Reply