

Best Pickled Okra Recipe hits that perfect balance of tangy, garlicky, and just-spicy-enough crunch, ideal for snackers, home canners, and anyone who wants a bold condiment in under 30 minutes of active time. It works for busy weeknights, weekend meal prep, or a lazy Sunday project that rewards you every time you open the fridge. I grew up in the South and still snack straight from the jar like a kid who just discovered a secret stash of sour candy.
Why Make This Best Pickled Okra Recipe at Home
Homemade pickled okra tastes brighter, crunchier, and more customizable than anything in a store jar. You control the spice level, the salt, and how garlicky you want it, so every batch fits your taste.
You also save money, especially when okra hits peak season and shows up in big baskets at the market. The recipe uses simple pantry ingredients and basic equipment, so you skip any fussy canning drama.
“This Best Pickled Okra Recipe gives crisp, tangy spears with just the right kick, and my family devours a jar in one sitting ★★★★★”
Ingredients You Need
Fresh produce
- Fresh okra pods
- Choose small to medium pods, about 2 to 4 inches long.
- Smaller pods stay more tender and crisp.
- Fresh garlic cloves
- Use 2 to 4 cloves per pint jar, sliced or smashed.
- Fresh hot peppers (optional but highly recommended)
- Jalapeño, serrano, or Fresno peppers work great.
- Slice them into rings or halve them lengthwise.
- Fresh dill (or dried)
- Fresh dill heads or sprigs give classic flavor.
- Use dried dill seed if you cannot find fresh.
Brine ingredients
- Distilled white vinegar
- Gives sharp, clean flavor and clear brine.
- Use 5 percent acidity vinegar for safe pickling.
- Water
- Use filtered water if your tap water tastes strongly of chlorine.
- Kosher salt or pickling salt
- Avoid iodized table salt, which can cloud the brine and taste harsh.
- Sugar (optional but tasty)
- A small amount balances the acidity and heat.
- Skip it if you prefer a sharper, more sour pickle.
Flavor boosters
Mix and match these to build your favorite version of this Best Pickled Okra Recipe.
- Black peppercorns
- Mustard seeds
- Coriander seeds
- Dill seed
- Celery seed
- Crushed red pepper flakes
- Bay leaves
- Smoked paprika for a subtle smoky note
- A strip of lemon peel or lime peel for citrus aroma
Pantry shortcuts and brand notes
- Use pre-peeled garlic from the refrigerated section if you feel short on time.
- Use pickling spice blends from brands like McCormick or Spice Islands if you want a shortcut.
- Use store brand distilled vinegar without worry, as long as it lists 5 percent acidity.
- Use canning or pickling salt from brands like Morton or Ball for the most consistent results.
Equipment list
- 4 to 6 pint jars with lids and rings
- Use canning jars if you plan to water bath can them.
- Large pot or Dutch oven for heating the brine
- Small saucepan if you want to warm lids
- Wide mouth funnel
- Tongs
- Ladle
- Clean kitchen towels
- Chopstick or thin spatula to release air bubbles
- Large stock pot or canning pot with rack if you plan to process jars for shelf storage
Tips & Mistakes
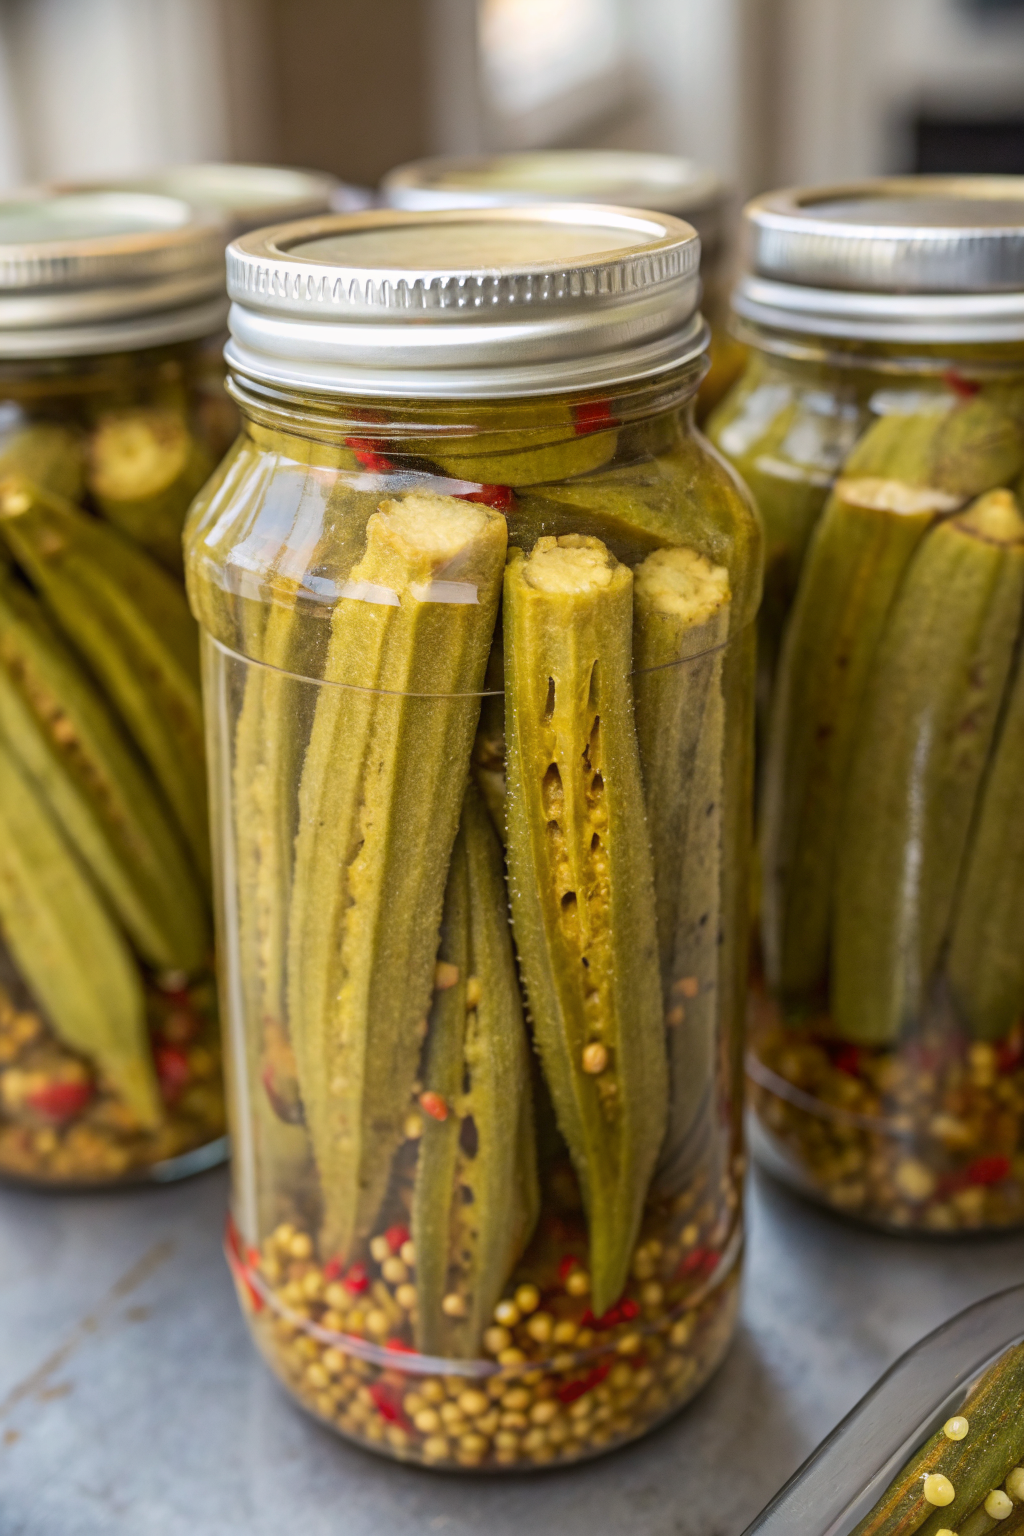
- Pack jars tightly with okra so the pods stay upright and do not float.
- Choose small, firm okra pods to avoid slimy texture.
- Trim only the stem tips and never cut into the pod or seeds, which can cause sliminess.
- Use vinegar with 5 percent acidity and never dilute it more than the recipe states.
- Cool jars at room temperature and never rush them into the fridge while hot.
- Keep the brine at a gentle simmer and avoid a rolling boil that can dull flavors.
- Add garlic and spices directly to jars so they flavor the okra more evenly.
- Taste the brine before you pour it and adjust salt or sugar to your preference.
- Let the jars sit at least 48 hours before tasting so flavors develop fully.
- Label jars with date and spice level so you track your favorite batches.
How to Make Best Pickled Okra Recipe
Step 1: Prep the okra and jars
Wash the okra pods under cool water and pat them completely dry. Trim just the very tip of the stem, leaving the pod sealed and intact. Wash jars, lids, and rings with hot soapy water and rinse well, then air dry on a clean towel.
If you plan to store jars in the pantry, place the jars in a large pot of hot water and heat them until hot but not boiling. This step helps prevent jar shock when you add hot brine.
Step 2: Pack the jars
Place garlic, hot pepper slices, dill, and whole spices in the bottom of each jar. Stand the okra pods upright, tips pointing up, and pack them snugly. Tuck smaller pods into gaps so they stay in place.
Leave about half an inch of headspace at the top of each jar. Use a few horizontal pods on top if you want to lock the vertical pods in place.
Step 3: Mix and heat the brine
In a large pot or Dutch oven, combine vinegar, water, salt, and sugar. Stir until the salt and sugar dissolve. Bring the mixture to a gentle boil, then lower the heat and keep it at a steady simmer.
Taste the brine carefully and adjust salt or sugar if needed. Keep the brine hot while you move to the next step.
Step 4: Fill jars with hot brine
Place a wide mouth funnel over a jar and ladle hot brine over the okra. Cover the pods completely and leave about half an inch of headspace. Slide a chopstick or thin spatula down the sides of the jar to release any trapped air bubbles.
Add more brine if the level drops. Wipe jar rims with a clean damp towel so lids seal well.
Step 5: Seal jars
Place lids on jars and screw on rings until fingertip tight. Do not crank them too hard, or air cannot escape during processing. At this point you can choose between refrigerator pickles or shelf stable pickles.
If you want quick refrigerator pickled okra, let the jars cool to room temperature, then chill them. If you want shelf stable jars, follow the next step.
Step 6: Water bath process for pantry storage
Place a canning rack in a large stock pot and fill it with enough hot water to cover jars by at least one inch. Heat the water until it simmers. Lower jars into the pot with tongs or a jar lifter.
Bring the water to a steady boil and process pint jars for 10 minutes at sea level. Adjust time for altitude if needed, following standard canning guidelines. Lift jars out, place them on a towel, and let them cool undisturbed.
Step 7: Wait and taste
Let jars cool completely, then move them to the fridge or pantry. Give the Best Pickled Okra Recipe at least 48 hours to develop flavor. The okra tastes good after two days and tastes amazing after about one week.
Taste a spear and note the heat level and tang. Use that feedback to tweak spices and peppers in your next batch.
Variations I've Tried
-
Spicy Cajun style
Add Cajun seasoning, extra garlic, and more hot pepper slices. Use smoked paprika and a pinch of cayenne for deeper heat. This version tastes great with red beans and rice or simple grilled chicken. -
Garlic dill classic
Load each jar with extra garlic and fresh dill, plus black peppercorns and mustard seeds. Skip sugar for a sharper bite. This version tastes closest to classic deli pickles, just with okra instead of cucumbers. -
Lemon herb version
Add a strip of lemon peel, fresh thyme, and a pinch of celery seed. Use a little sugar to balance the citrus. This version pairs nicely with roasted vegetables and grain bowls. -
Mild kid friendly batch
Skip hot peppers and crushed red pepper flakes. Add a bit more sugar and lots of dill. Kids often enjoy this version as a crunchy snack.
How to Serve Best Pickled Okra Recipe
Serve this Best Pickled Okra Recipe straight from the jar as a crunchy snack or appetizer. Add spears to snack boards with cheese, hummus, olives, and crackers. Chop them and stir into tuna salad, chicken salad, or egg salad for a tangy crunch. Pile them on burgers, sandwiches, grain bowls, or alongside barbecue, fried chicken, or simple roasted veggies.
How to store
- Store refrigerator pickled okra in the fridge for up to 2 months, and keep the okra submerged in brine.
- Store properly processed, sealed jars in a cool, dark pantry for up to 1 year, then move to the fridge after opening.
- Keep opened jars in the fridge and use within 1 to 2 months for best texture and flavor.
- Serve straight from the fridge and skip reheating, since heat softens the okra and dulls the bright pickle flavor.
Best Pickled Okra Recipe
Ingredients
Instructions
- Wash the okra pods under cool water and pat them completely dry. Trim only the very tip of the stem, leaving each pod sealed and intact to avoid sliminess.
- Wash jars, lids, and rings with hot soapy water, rinse well, and air dry on a clean towel. If you plan to store jars in the pantry, place the jars in a large pot of hot water and heat until hot but not boiling so they are ready for hot brine.
- Divide the garlic, hot pepper slices, dill, and chosen spices among 4 to 6 pint jars, placing them in the bottom of each jar.
- Stand the okra pods upright in the jars with tips pointing up, packing them snugly so they do not float. Tuck smaller pods into gaps and use a few horizontal pods on top to lock the vertical pods in place, leaving about 1/2 inch of headspace at the top.
- In a large pot or Dutch oven, combine the vinegar, water, salt, and sugar (if using). Stir until the salt and sugar dissolve.
- Bring the mixture to a gentle boil, then reduce the heat and keep it at a steady simmer. Taste carefully and adjust salt or sugar to your preference while maintaining a bright, tangy flavor.
- Place a wide mouth funnel over each packed jar and ladle hot brine over the okra, covering the pods completely and leaving about 1/2 inch of headspace.
- Slide a chopstick or thin spatula down the sides of each jar to release trapped air bubbles, then add more brine if needed to keep the okra fully submerged. Wipe the rims clean with a damp towel.
- Place lids on the jars and screw on the rings until fingertip tight, not overly tight, so air can escape if you process them.
- For quick refrigerator pickled okra, let jars cool to room temperature, then refrigerate. Keep the okra submerged in brine and chill at least 48 hours before tasting.
- For shelf-stable jars, place a canning rack in a large stock pot, fill with enough hot water to cover jars by at least 1 inch, and heat until simmering. Lower the jars onto the rack, bring the water to a steady boil, and process pint jars for 10 minutes at sea level, adjusting for altitude as needed.
- Carefully remove jars, place on a towel, and let them cool undisturbed. Check that the lids have sealed before storing in a cool, dark pantry.
- Allow the pickled okra to rest at least 48 hours before eating so the flavors develop, with best flavor after about 1 week.
- Serve straight from the jar as a crunchy snack or appetizer, or add to snack boards, salads, sandwiches, burgers, grain bowls, and plates of barbecue, fried chicken, or roasted vegetables.
Notes
Approximate per spear (about 1/12 of a pint jar, roughly 20 g): 5–10 calories; fat 0 g; saturated fat 0 g; carbohydrates 2 g; fiber 1 g; sugars 0–1 g; protein 0 g; sodium 80–120 mg. Values will vary based on exact brine strength, sugar amount, spice choices, and portion size. Storage
Refrigerator pickled okra keeps in the fridge up to 2 months as long as the pods stay submerged in brine. Properly processed, sealed jars can be stored in a cool, dark pantry for up to 1 year, then refrigerated after opening and used within 1 to 2 months. For best crunch and bright flavor, always serve cold and avoid reheating.
Leave a Reply