
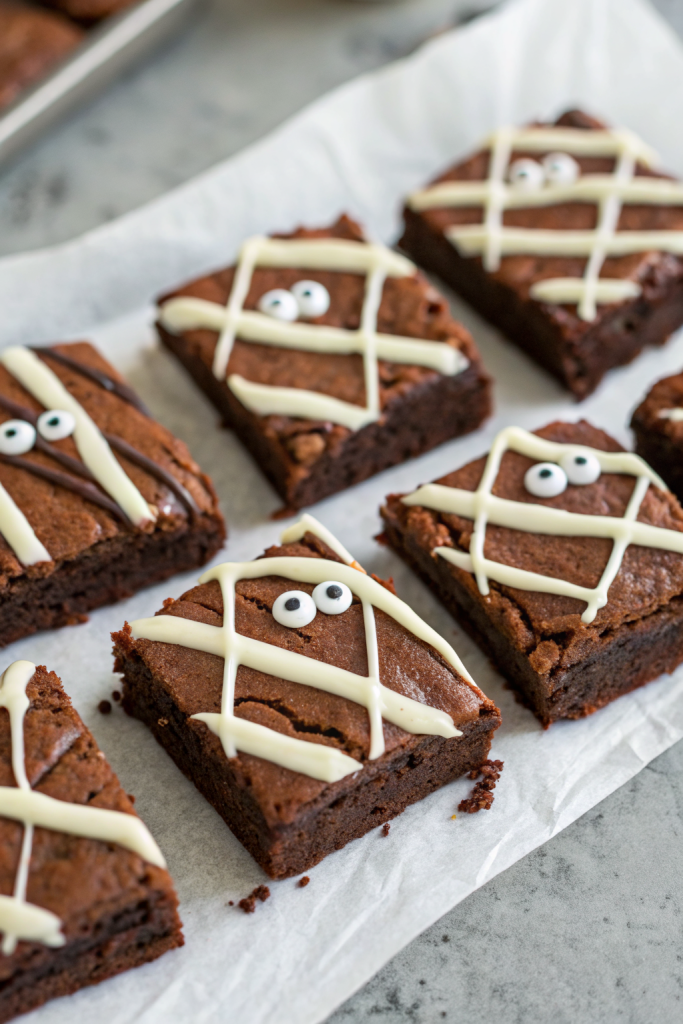
Spooky Mummy Brownies Recipe tastes like a rich, fudgy brownie hugged by creamy vanilla frosting and sweet candy eyes, with just enough Halloween flair to make kids squeal and adults “taste test” thirds. This recipe works perfectly for busy parents, party hosts, or anyone who wants a cute dessert in under an hour, start to finish. I first baked these for my neighbor’s Halloween potluck, and my tray mysteriously vanished before the main course even hit the table.
Why Spooky Mummy Brownies Recipe Is Worth It
These mummy brownies deliver bakery-level fudginess with simple pantry ingredients and shortcut-friendly options. You dress up a basic brownie base with an easy drizzle and candy eyes, so the whole thing feels impressive without any advanced decorating skills.
Kids can help with almost every step, especially the “mummy wrapping” drizzle, which means you get dessert and an activity in one shot. The recipe scales easily, travels well, and still tastes amazing the next day, so it works great for school parties and office treat tables.
“These Spooky Mummy Brownies disappeared faster than the candy bowl on Halloween night and everyone asked for the recipe! ★★★★★”
Ingredients You Need
Brownie Base
You can use a boxed mix or a from-scratch batter. I’ll list both so you can choose your own adventure.
Option 1: Boxed Brownie Shortcut (9×13 pan)
- 1 box fudgy brownie mix (18–19 oz; I like Ghirardelli or King Arthur for rich flavor)
- Ingredients listed on the box (usually eggs, oil, and water; follow package amounts)
- 1 teaspoon vanilla extract (optional, but boosts flavor)
- ½ teaspoon espresso powder (optional, deepens chocolate taste without coffee flavor)
Option 2: Homemade Fudgy Brownies (9×13 pan)
- 1 cup (2 sticks) unsalted butter, melted and slightly cooled
- 2 cups granulated sugar
- ½ cup light brown sugar, packed
- 4 large eggs, room temperature
- 2 teaspoons vanilla extract
- 1 cup all-purpose flour (scoop and level for accuracy)
- 1 cup unsweetened cocoa powder (Dutch-process gives deeper color)
- 1 teaspoon fine sea salt
- ½ teaspoon espresso powder (optional but highly recommended)
- 1 cup chocolate chips or chunks (semi-sweet or dark)
Mummy Decoration
- 1½–2 cups white chocolate chips or white candy melts
- Candy melts set a bit firmer and handle warm rooms better.
- 1–2 teaspoons neutral oil (canola, vegetable, or coconut) to thin the melted coating
- Candy eyeballs (Wilton or store brand; plan on 2 per brownie, plus extras for snacking)
- Optional:
- Black gel icing for extra “stitches” or cracks
- Orange or purple sprinkles to scatter around the platter
Equipment List
- 9×13-inch baking pan
- Parchment paper (helps lift brownies out cleanly)
- Large mixing bowl (or stand mixer bowl)
- Whisk and rubber spatula
- Microwave-safe bowl or double boiler for melting white chocolate
- Piping bag, zip-top bag, or squeeze bottle for mummy drizzle
- Toothpick or small offset spatula
- Wire cooling rack
- Sharp knife or bench scraper for clean cuts
Quick Tips & substitutions
- Line the pan with parchment and leave overhang so you lift the whole slab out easily.
- Chill the baked brownies before cutting so you slice neat squares without crumbling.
- Use a boxed mix when you feel short on time; add vanilla and espresso powder to make it taste homemade.
- Swap butter with melted coconut oil for a subtle coconut note and dairy-light option.
- Use gluten-free brownie mix or a 1:1 gluten-free flour blend in the homemade version.
- Thin white chocolate with 1–2 teaspoons oil so it drizzles smoothly and sets with a nice sheen.
- Use a zip-top bag with a tiny corner snipped if you don’t own piping bags.
- Press candy eyes into the drizzle while it still feels soft so they stick firmly.
- Cut brownies before decorating so each square gets its own mummy face.
- Store candy eyeballs in a dry spot; moisture can smudge the pupils and make the mummies look… extra haunted.
How to Make Spooky Mummy Brownies Recipe
Step 1: Mix the Brownie Batter
Preheat your oven to 350°F (175°C) and line a 9×13 pan with parchment, leaving a little overhang on the long sides. Lightly grease the parchment and exposed pan edges so nothing clings.
If using boxed mix:
Pour the mix into a large bowl and add the eggs, oil, and water listed on the package. Stir in vanilla and espresso powder until the batter looks smooth and glossy, then stop so you don’t overmix.
If making homemade brownies:
Whisk melted butter, granulated sugar, and brown sugar until the mixture looks thick and shiny. Add eggs one at a time, whisking well after each, then whisk in vanilla and espresso powder. Sift in flour, cocoa powder, and salt, then fold gently with a spatula until only a few streaks remain; fold in chocolate chips just until combined.
Step 2: Bake the Brownies
Pour the batter into the prepared pan and spread it into an even layer, pushing it into the corners. Tap the pan on the counter a couple of times to pop air bubbles.
Bake for 22–28 minutes for boxed mix or 25–30 minutes for homemade, depending on your oven. Check with a toothpick in the center; you want moist crumbs but no wet batter. Pull the pan out and set it on a wire rack.
Step 3: Cool and Slice
Let the brownies cool in the pan for at least 30–40 minutes. For super clean mummy faces, slide the pan into the fridge for another 30 minutes.
Use the parchment overhang to lift the whole brownie slab onto a cutting board. Trim the edges if you want sharp sides, then cut into 18–24 rectangles or squares, depending on how big you want each mummy. Wipe the knife between cuts to keep the edges neat.
Step 4: Melt the White Chocolate “Bandages”
Pour white chocolate chips or candy melts into a microwave-safe bowl. Microwave in 20–30 second bursts, stirring between each, until the mixture turns smooth and fluid.
Stir in 1 teaspoon neutral oil and check the consistency; add a bit more oil if the drizzle looks too thick. You want it to run in ribbons off a spoon but still hold some shape on the brownie.
Transfer the melted coating to a piping bag, squeeze bottle, or zip-top bag. If you use a bag, push the chocolate toward one corner and twist the top closed. Snip a tiny opening at the tip; you can always cut it larger if needed.
Step 5: Decorate the Mummy Brownies
Arrange the cut brownies on a parchment-lined tray or cooling rack. Work with a few at a time so the drizzle stays soft while you add eyes.
Pipe zigzag lines across each brownie, moving side to side to mimic mummy bandages. Vary the angles and thickness a bit so each mummy looks unique. Leave a small gap where you want the eyes to “peek out.”
While the white drizzle still feels soft, gently press two candy eyeballs into each brownie. Add a little extra drizzle over the top or bottom of the eyes if you want them to look partially wrapped. If you use black gel icing, add tiny “stitches” or cracks once the white coating sets.
Let the decorated brownies sit at room temperature until the white chocolate firms up, about 20–30 minutes. If your kitchen runs warm, slide the tray into the fridge for 10–15 minutes to speed things up.
Recipe Variations
- Gluten-free: Use a gluten-free brownie mix or swap the flour in the homemade version with a 1:1 gluten-free baking blend.
- Dairy-free: Use oil instead of butter, dairy-free chocolate chips, and dairy-free white baking chips or a coconut oil–based white coating.
- Egg-free / vegan: Use a vegan brownie mix or your favorite flax-egg brownie recipe, then top with vegan-friendly white chips and gel decorations.
- Low sugar: Use a reduced-sugar brownie mix or a recipe that uses a sugar substitute, and choose sugar-free chocolate chips where possible.
- Extra chocolate: Add a layer of mini chocolate chips on top of the brownie batter before baking for extra fudgy bites.
- Peanut butter mummies: Swirl ½ cup warmed peanut butter into the top of the brownie batter before baking, then decorate as usual.
- Spooky flavor twist: Add ½ teaspoon cinnamon and a pinch of cayenne to the batter for a subtle “hot chocolate” vibe.
Ways to Serve Spooky Mummy Brownies Recipe
- Pack them in lunchboxes as a surprise Halloween treat.
- Arrange them on a black or orange platter with plastic spiders scattered around.
- Serve with cold milk or hot cocoa for a cozy movie-night dessert.
- Wrap individual brownies in clear treat bags with ribbon for party favors.
- Add them to a Halloween dessert board with cookies, caramel apples, and fruit.
Storage Success
Store Spooky Mummy Brownies in an airtight container at room temperature for up to 3 days. Keep them in a single layer or separate layers with parchment so the mummy drizzle stays neat. If your kitchen runs warm or you use a softer white coating, keep the container in the fridge and let brownies sit at room temperature for 10–15 minutes before serving. You can also freeze undecorated brownie squares for up to 2 months, then thaw, cut, and decorate closer to Halloween.
Spooky Mummy Brownies Recipe
Ingredients
Instructions
- Preheat the oven to 350°F (175°C). Line a 9x13-inch baking pan with parchment paper, leaving an overhang on the long sides, and lightly grease the parchment and exposed pan edges.
- For boxed brownies: Add the brownie mix to a large bowl. Add the eggs, oil, and water as directed on the package. Stir in the vanilla extract and espresso powder, if using, and mix just until the batter is smooth and glossy.
- For homemade brownies: In a large bowl, whisk together the melted butter, granulated sugar, and brown sugar until thick and shiny. Whisk in the eggs one at a time, then add the vanilla extract and espresso powder, if using.
- Sift the flour, cocoa powder, and salt over the wet ingredients, then gently fold with a rubber spatula until almost combined. Fold in the chocolate chips or chunks just until no dry streaks remain.
- Pour the batter into the prepared pan and spread it into an even layer, making sure to reach the corners. Tap the pan firmly on the counter a few times to release air bubbles.
- Bake boxed brownies for about 22–28 minutes, or homemade brownies for about 25–30 minutes, until a toothpick inserted in the center comes out with moist crumbs but no wet batter.
- Place the pan on a wire rack and let the brownies cool in the pan for at least 30–40 minutes. For cleaner slices, chill the pan in the refrigerator for an additional 30 minutes.
- Use the parchment overhang to lift the cooled brownie slab out of the pan and onto a cutting board.
- Trim the edges if desired, then cut the brownies into 18–24 rectangles or squares, wiping the knife between cuts for neat edges.
- Arrange the cut brownies on a parchment-lined baking sheet or wire rack, leaving space between each piece for decorating.
- Place the white chocolate chips or candy melts in a microwave-safe bowl. Microwave in 20–30 second bursts, stirring after each burst, until completely melted and smooth.
- Stir in 1 teaspoon of neutral oil to thin the mixture. Add up to 1 more teaspoon if needed until the melted coating runs in ribbons off a spoon but still holds some shape when drizzled.
- Transfer the melted white chocolate to a piping bag, squeeze bottle, or a zip-top bag with the chocolate pushed into one corner. Twist the top closed and snip a small opening at the tip.
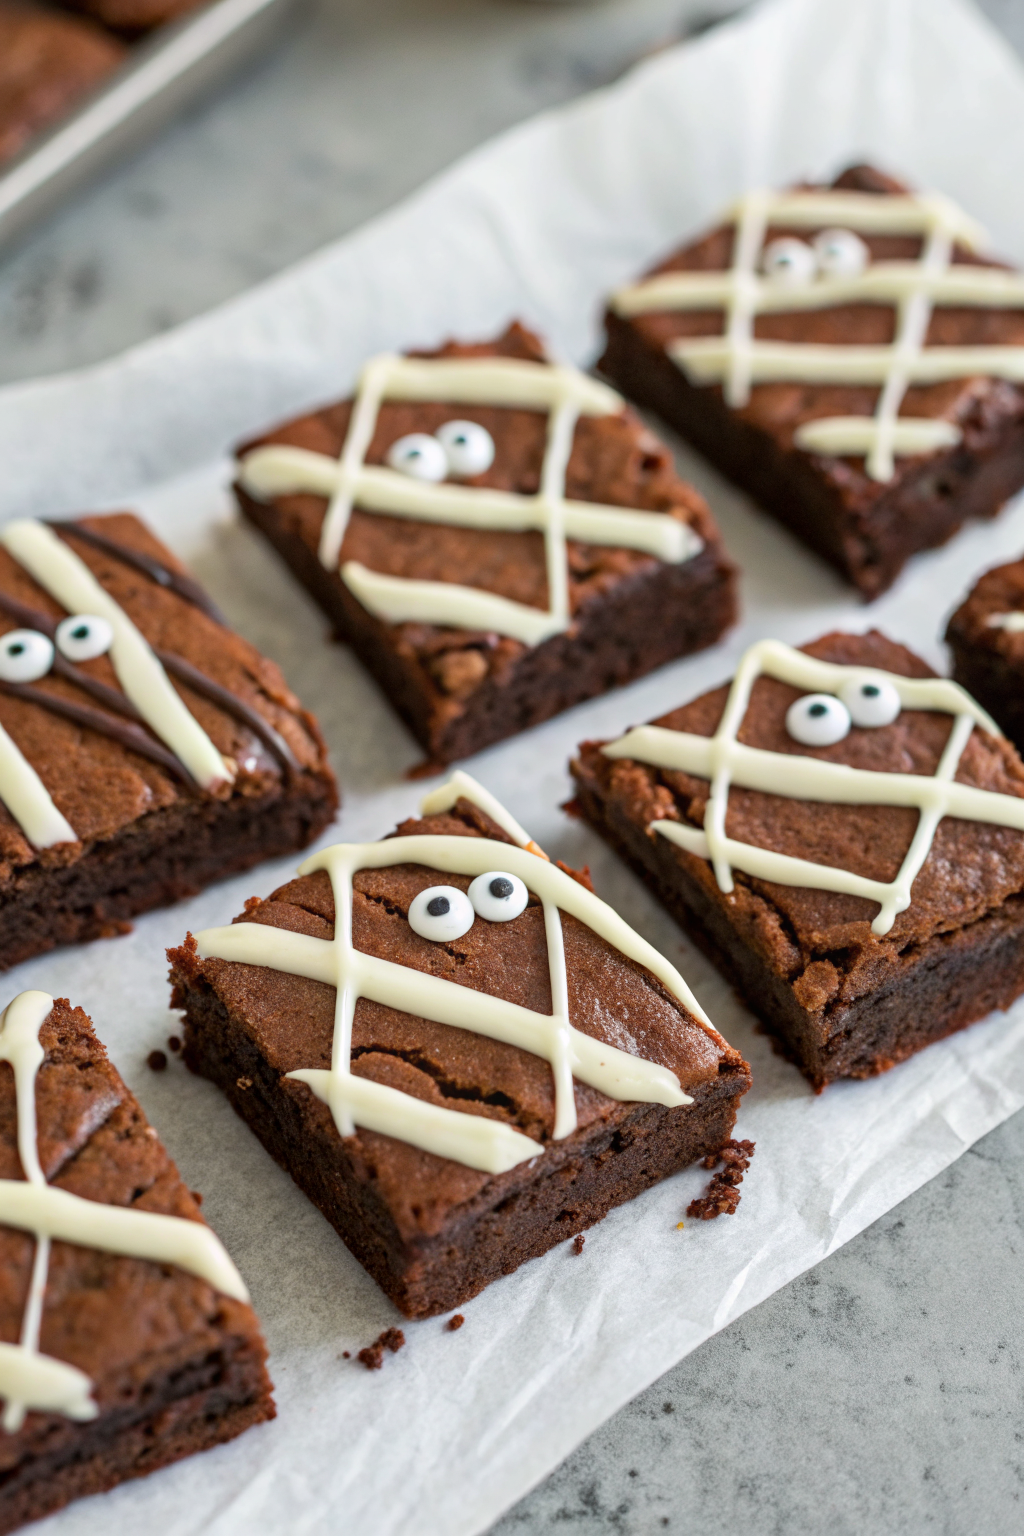
- Working with a few brownies at a time, pipe thin zigzag lines of melted white chocolate across each brownie to resemble mummy bandages, changing direction and angle slightly for a wrapped effect.
- Leave a small open space where you want the eyes to peek through, then gently press two candy eyeballs into the soft white chocolate on each brownie.
- Drizzle a bit more white chocolate above or below the eyes if you want them to look partly wrapped. Add black gel icing “stitches” or sprinkles around the brownies if desired.
- Let the brownies sit at room temperature until the white chocolate sets, about 20–30 minutes, or chill briefly in the refrigerator to speed up setting before serving.
Notes
Approximate for 1 of 20 brownies (homemade base with chocolate chips and white chocolate drizzle): 260–290 calories; fat 14–16 g; saturated fat 8–10 g; carbohydrates 34–37 g; fiber 2 g; sugars 26–29 g; protein 3–4 g; sodium 130–170 mg. Using a boxed mix, different chocolate brands, or alternative toppings will change the values.
Leave a Reply