
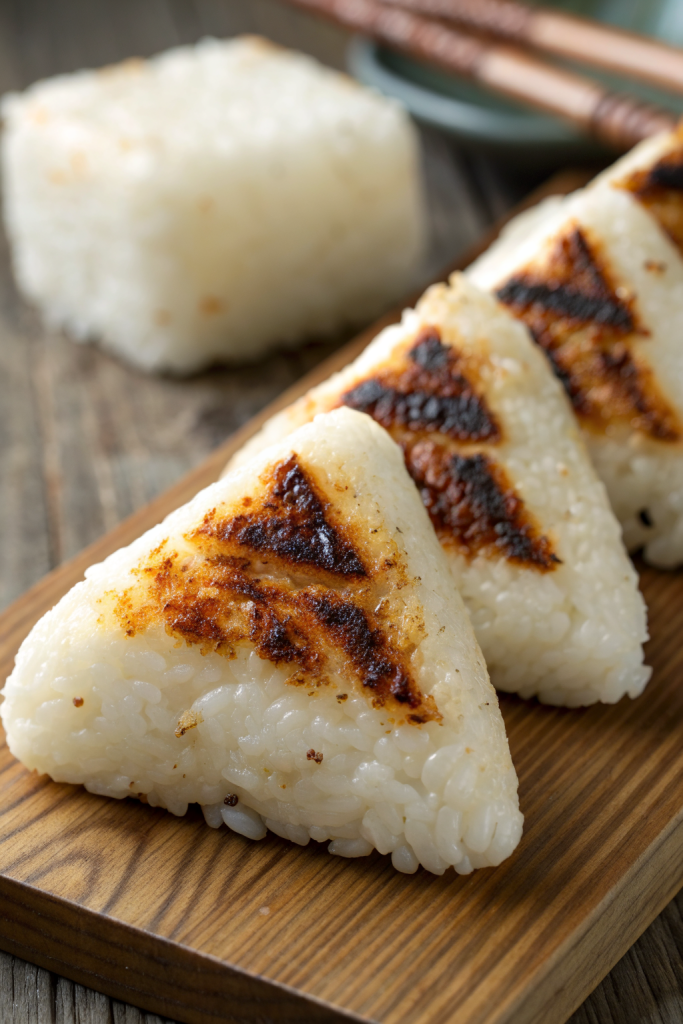
Yaki Onigiri Japanese Grilled Rice Balls Recipe tastes smoky, nutty, a little salty, and incredibly comforting, like the best part of crispy rice at the bottom of the pot. It works perfectly for busy home cooks who want a quick snack or side dish in about 35 minutes, start to finish. I still remember burning my first batch in a tiny apartment kitchen, so you can learn from my mistakes instead of repeating them.
Why You Should Try This Yaki Onigiri Japanese Grilled Rice Balls Recipe
Yaki Onigiri Japanese Grilled Rice Balls Recipe gives you crispy edges, a chewy center, and a glossy soy glaze that hits all the savory notes. You get serious flavor from simple pantry ingredients and a very budget friendly rice base.
This recipe fits weeknight dinners, lunch boxes, game day snacks, and late night fridge raids. You can keep it plain and simple or stuff the rice balls with fillings like tuna mayo or miso for extra fun.
“Perfectly crisp outside, tender inside, and wildly snackable, this Yaki Onigiri Japanese Grilled Rice Balls Recipe became an instant family favorite. ★★★★★”
Ingredients You’ll Need
Rice
- 3 cups cooked Japanese short grain rice (about 1.5 cups uncooked)
- Use sushi rice or any labeled “short grain” rice.
- Avoid long grain rice since it does not stick together well.
- If you use leftover rice, warm it slightly and sprinkle a little water so it softens.
Seasoning & Glaze
- 2 tbsp soy sauce
- Use regular Japanese soy sauce like Kikkoman or Yamasa.
- Use low sodium soy sauce if you prefer a milder salt level.
- 1 tbsp mirin
- If you do not have mirin, mix 1 tbsp water with 1/2 tsp sugar as a quick swap.
- 1 tsp sugar
- Brown sugar adds a deeper flavor, white sugar keeps it clean and light.
- 1 tsp toasted sesame oil
- 1 tbsp neutral oil for grilling (canola, vegetable, or light olive oil)
- Optional: 1 tsp miso paste for a richer, savory glaze
- Any white or yellow miso works; thin it with a teaspoon of water before mixing.
Optional Fillings
Pick one or mix and match. Keep the pieces small so the rice balls hold together.
- 1/4 cup canned tuna mixed with 1 tbsp Japanese mayo and a pinch of salt
- 2 tbsp cooked salmon flakes
- 2 tbsp pickled plum (umeboshi), pitted and chopped
- 2 tbsp shredded nori or furikake rice seasoning
- 2 tbsp finely chopped scallions
Toppings & Garnishes
- Toasted sesame seeds
- Shredded nori or small nori strips
- Extra soy sauce for dipping
- Shichimi togarashi (Japanese chili seasoning) for a little heat
Equipment
- Rice cooker or pot for cooking rice
- Medium bowl for mixing glaze
- Small bowl of water and a pinch of salt for shaping rice
- Nonstick skillet, cast iron pan, or grill pan
- Silicone brush or spoon for brushing glaze
- Spatula or tongs
Tips & Tricks
- Cook the rice slightly firm so it holds shape but still feels sticky and tender.
- Shape the rice while warm, not hot and not cold, so it sticks without burning your hands.
- Wet your hands with salted water before shaping to keep rice from sticking and to season it lightly.
- Pack the rice firmly; loose rice balls fall apart on the pan or grill.
- Keep the rice balls about the size of your palm so they cook evenly and do not break.
- Use medium heat; high heat burns the glaze before the rice crisps.
- Brush the glaze on after the rice forms a crust, not right away, so the surface does not stick.
- Flip gently with a thin spatula; do not rush the first flip or the rice may tear.
- If you use fillings, keep them in the center and surround them fully with rice.
- Lightly oil the pan and the surface of the rice balls for extra crisp edges.
How to Make Yaki Onigiri Japanese Grilled Rice Balls Recipe
Step 1: Cook and Season the Rice
Rinse the short grain rice under cold water until the water runs mostly clear. Cook it in a rice cooker or pot with the usual water ratio on the package. When it finishes, let it sit covered for 10 minutes so the steam settles and the texture evens out.
Fluff the rice gently with a rice paddle or spatula. Taste a small bite and add a pinch of salt if it needs more seasoning. Keep the rice warm, covered with a lid or towel, while you prepare the glaze.
Step 2: Mix the Glaze
In a small bowl, stir together soy sauce, mirin, sugar, and toasted sesame oil. If you use miso, whisk it with a teaspoon of water, then mix it into the glaze until smooth. Set the glaze near the stove with a brush or spoon ready.
Taste a drop of the glaze. Adjust with a little more sugar if you like a sweeter flavor or a splash more soy sauce if you like it saltier. Keep the glaze at room temperature so it brushes on easily.
Step 3: Shape the Rice Balls
Fill a small bowl with water and add a pinch of salt. Wet your hands lightly and rub them together so the salted water coats your palms. Scoop about 1/3 to 1/2 cup of warm rice into your hand.
If you use a filling, press a shallow dent in the center of the rice and add about 1 teaspoon of filling. Cover the filling with a little more rice. Press and shape the rice into a triangle or round shape, packing it firmly but gently.
Rotate the rice ball in your hands and smooth the edges. Aim for about 1 to 1.5 inches thick so the center heats through and the outside crisps nicely. Place the shaped rice balls on a plate or tray while you finish the batch.
Step 4: Sear the Rice Balls
Heat a nonstick skillet or cast iron pan over medium heat. Add neutral oil and swirl to coat the surface. When the oil shimmers, place the rice balls in the pan with a little space between each one.
Cook the rice balls on the first side for 3 to 4 minutes without moving them. Check the bottom by gently lifting one; you want a golden brown crust. Flip and cook the second side for another 3 to 4 minutes.
Turn the rice balls on the remaining sides or edges so every surface gets some color. Add a tiny drizzle of oil if the pan looks dry. Keep the heat at medium so the crust develops slowly and evenly.
Step 5: Brush with Glaze
When the rice balls feel firm and have a light crust, start brushing the tops with the soy glaze. Cook for 1 to 2 minutes so the glaze bubbles and clings to the surface. Flip and brush the other side with glaze.
Repeat with thin layers of glaze instead of one heavy coat. The sugar in the glaze caramelizes and gives a shiny, slightly sticky finish and deeper flavor. Rotate and brush the edges so every bite tastes seasoned.
Taste one rice ball if you can resist waiting. If you want a stronger flavor, give them one more quick brush with glaze off the heat. Sprinkle with sesame seeds or nori strips while the surface still feels tacky so they stick.
Step 6: Serve
Transfer the Yaki Onigiri Japanese Grilled Rice Balls Recipe to a plate or wooden board. Garnish with extra sesame seeds, nori, and a pinch of shichimi togarashi if you like spice. Serve hot or warm for the best texture and flavor.
Set a small dish of soy sauce on the side for dipping. Add sliced cucumbers, pickled radish, or a simple salad if you want a more complete snack plate. Enjoy them by hand or with chopsticks.
What to Serve with Yaki Onigiri Japanese Grilled Rice Balls Recipe
Yaki Onigiri Japanese Grilled Rice Balls Recipe pairs beautifully with miso soup, a simple bowl of steamed edamame, or a crisp cucumber salad. Kids love them with sliced fruit like oranges or grapes for a fun bento style meal. You can also serve them alongside grilled chicken skewers, teriyaki tofu, or a big veggie stir fry.
They also shine as a side dish with ramen or udon noodle soup. Add a small dish of kimchi or Japanese pickles if you enjoy a tangy contrast.
Storage Options
- Cool the rice balls completely, then store them in an airtight container in the fridge for up to 3 days.
- Wrap each rice ball tightly in plastic wrap, then place them in a freezer bag and freeze for up to 1 month.
- Reheat chilled rice balls in a covered skillet over low to medium heat with a tiny splash of water until hot and crisp again.
- Reheat frozen rice balls in the microwave until warm, then finish in a lightly oiled pan to bring back the crispy exterior.
Yaki Onigiri Japanese Grilled Rice Balls Recipe
Ingredients
Instructions
- Rinse Japanese short grain rice under cold water until the water runs mostly clear, then cook it in a rice cooker or pot following the usual water ratio on the package.
- When the rice finishes cooking, let it sit covered for 10 minutes to allow the steam to settle and the texture to even out.
- Fluff the rice gently with a rice paddle or spatula, taste, and add a pinch of salt if needed. Keep the rice warm and covered while you prepare the glaze.
- In a small bowl, stir together the soy sauce, mirin, sugar, and toasted sesame oil until the sugar dissolves.
- If using miso, whisk it with a teaspoon of water to loosen, then mix it into the glaze until smooth.
- Taste a drop of the glaze and adjust with a little more sugar for sweetness or a splash more soy sauce for saltiness. Set the glaze near the stove with a brush or spoon ready.
- Fill a small bowl with water and add a pinch of salt. Wet your hands lightly with the salted water to keep the rice from sticking and to season the surface.
- Scoop about 1/3 to 1/2 cup of warm rice into your hand. If using a filling, press a shallow dent in the center of the rice and add about 1 teaspoon of filling, then cover with a little more rice.
- Press and shape the rice into a firm triangle or round, about 1 to 1.5 inches thick, rotating and smoothing the edges so it holds together well.
- Place the shaped rice balls on a plate or tray and repeat with the remaining rice and fillings.
- Heat a nonstick or cast iron skillet over medium heat. Add the neutral oil and swirl to coat the surface.
- Arrange the rice balls in the pan with a little space between each one. Cook on the first side for 3 to 4 minutes without moving, until a golden brown crust forms.
- Flip and cook the second side for another 3 to 4 minutes. Turn the rice balls onto their remaining sides or edges so every surface gets some color, adding a small drizzle of oil if the pan looks dry.
- When the rice balls feel firm and lightly crusted, brush the tops with a thin layer of soy glaze and cook for 1 to 2 minutes until the glaze bubbles and clings.
- Flip, brush the other side with glaze, and cook briefly again. Repeat with thin layers of glaze as needed, rotating to coat the edges so every bite is seasoned.
- Transfer the yaki onigiri to a plate or wooden board and sprinkle with toasted sesame seeds and nori strips while the surface is still tacky. Add a pinch of shichimi togarashi if you like heat.
- Serve hot or warm with extra soy sauce for dipping, alongside simple sides like pickles, salad, or miso soup if desired.
Notes
Approximate per 1 rice ball (6 servings total, without optional fillings): 180 calories; fat 5 g; saturated fat 0.5 g; carbohydrates 30 g; fiber 1 g; sugars 2 g; protein 3 g; sodium 330 mg. Values are estimates and will vary based on rice type, soy sauce brand, optional fillings, and portion size.