
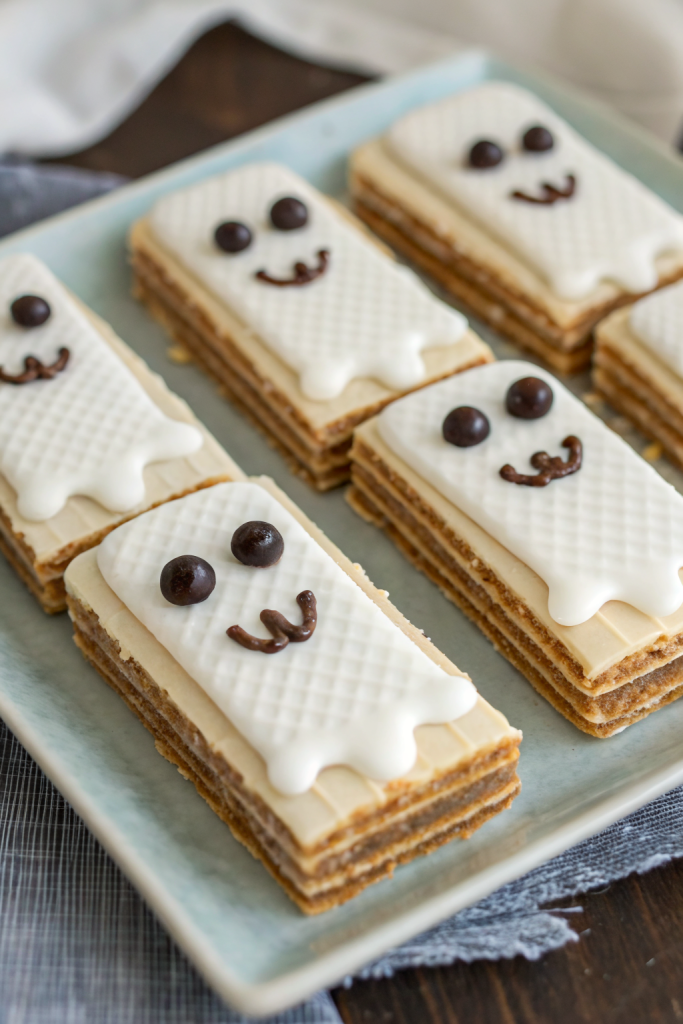
Chocolate Dipped Ghost Wafer Cookies Recipe tastes like a crunchy s’mores situation met a candy bar and decided to wear a Halloween costume. This recipe works for busy parents, last‑minute party hosts, and anyone who wants a spooky dessert in under 45 minutes, start to finish. I tested these with my nieces, and they cackled so hard at the chocolate “hair” that my dog left the room.
Why Chocolate Dipped Ghost Wafer Cookies Recipe Is Worth It
You get a big payoff with almost no effort, which feels like cheating in the best way. The wafer cookies stay crisp, the chocolate sets with a nice snap, and the marshmallow “ghost” gives every bite a gooey center.
Kids can decorate these without much supervision, and adults can batch them for office trays or school parties. You only need a microwave, a few bowls, and a baking sheet, so your kitchen stays clean enough to still look respectable.
“These Chocolate Dipped Ghost Wafer Cookies disappeared from the Halloween dessert table in ten minutes flat and everyone asked for the recipe. ★★★★★”
Ingredients You Need
Main ingredients
-
Wafer cookies
- 24–30 vanilla wafer sticks (the long layered kind; any brand works, I like Voortman or Keebler)
- Use chocolate or strawberry wafers if you want “costume changes” for your ghosts.
-
Chocolate coating
- 1 ½ cups white chocolate chips or white candy melts
- 1 cup semisweet or milk chocolate chips (for hair, bases, or drizzles)
- 1 tablespoon refined coconut oil or neutral vegetable oil (helps the coating set smooth)
-
Marshmallow ghost topping
- 1 cup marshmallow creme (a jar of Fluff works great)
- 1 cup mini marshmallows (optional, for extra height or texture)
-
Faces and details
- ¼ cup mini chocolate chips (perfect for eyes and mouths)
- Black decorating gel or edible marker (backup option for faces)
- Halloween sprinkles, orange sanding sugar, or crushed chocolate cookies for “dirt”
-
Flavor boosts (optional but fun)
- ½ teaspoon vanilla extract for the white chocolate
- ¼ teaspoon almond extract or orange extract for a subtle twist
- Pinch of fine sea salt to balance the sweetness
Pantry shortcuts and swaps
- Use store‑brand wafers to keep costs low; the chocolate and decor steal the show.
- Swap white chocolate chips with vanilla almond bark or candy coating if you want easier melting.
- Use pre‑made candy eyes instead of mini chips if you want extra expression with zero effort.
Equipment list
- Baking sheet lined with parchment paper or a silicone mat
- Microwave‑safe bowls (one for white chocolate, one for dark chocolate)
- Small heatproof spatula or spoon
- Toothpicks or a skewer (helps with dipping and face details)
- Piping bag or zip‑top bag (for neat marshmallow ghosts or chocolate drizzles)
- Cooling rack (optional, but helps chocolate set faster)
Quick Tips & substitutions
- Use candy melts or almond bark if white chocolate chips seize or clump on you often.
- Dry the wafers well and keep them at room temperature so condensation does not mess with the chocolate.
- Add ½ teaspoon neutral oil at a time to thin chocolate that looks too thick for dipping.
- Chill the decorated cookies on a flat tray in the fridge for 10–15 minutes to set the chocolate quickly.
- Swap marshmallow creme with stiff royal icing if you need ghosts that stay firm for hours at a warm party.
- Use gluten‑free wafer cookies and certified gluten‑free chocolate to make the whole tray safe for gluten‑free guests.
- Skip coconut oil and use avocado or canola oil if anyone at the party avoids coconut.
- Store candy eyes and sprinkles nearby and decorate each cookie right after dipping, before the chocolate firms up.
How to Make Chocolate Dipped Ghost Wafer Cookies Recipe
Step 1: Set up your dipping station
Line a baking sheet with parchment paper or a silicone mat.
Lay out the wafer cookies in a single layer so you can grab them quickly.
Place mini chocolate chips, candy eyes, and sprinkles in small bowls within arm’s reach.
Step 2: Melt the white chocolate
Add white chocolate chips and half the oil to a microwave‑safe bowl.
Microwave in 20–30 second bursts, stirring after each round, until the chocolate turns smooth and glossy.
Stir in vanilla extract and a tiny pinch of salt, then check the texture; add a bit more oil if it looks too thick.
Step 3: Dip the wafers
Hold a wafer cookie at one end and dip it about three‑quarters of the way into the white chocolate.
Let excess chocolate drip back into the bowl, then gently tap your wrist to knock off extra drips.
Lay the dipped wafer on the prepared baking sheet, chocolate side up, and repeat with the rest.
Step 4: Shape the ghost bodies
Spoon marshmallow creme into a piping bag or a zip‑top bag with a small corner snipped off.
Pipe a fluffy blob of marshmallow near the top of each dipped wafer to form the ghost “head” and shoulders.
Swirl the tip slightly as you lift it to give each ghost a little wavy top, like a tiny marshmallow flame.
Step 5: Add faces and personality
Press two mini chocolate chips into the marshmallow for eyes while it still feels sticky.
Use another chip sideways for an “O” mouth, or draw expressions with black decorating gel.
Give some ghosts chocolate “hair” by dotting melted dark chocolate along the top edge or adding a sprinkle “headband.”
Step 6: Melt and drizzle dark chocolate
Melt the semisweet or milk chocolate with the remaining oil in a clean bowl, again using short microwave bursts.
Stir until smooth, then transfer to a small piping bag or a zip‑top bag.
Drizzle over the bottoms of the wafers, or dip just the base to give each ghost a chocolate “shoes” moment.
Step 7: Chill and set
Slide the baking sheet into the fridge and chill the cookies for 10–15 minutes, until the chocolate feels firm.
Check one cookie by gently lifting it; the coating should hold its shape and not smear.
Keep them on the tray until you feel ready to plate or package them so they stay neat.
Step 8: Plate and serve
Arrange the Chocolate Dipped Ghost Wafer Cookies on a platter in rows or a playful spiral.
Scatter extra sprinkles or crushed chocolate cookies around them for a graveyard effect.
Snap a quick photo, because these tend to vanish faster than you expect.
Recipe Variations
- Gluten‑free: Use gluten‑free wafer cookies and double‑check that your chocolate and sprinkles carry a gluten‑free label.
- Dairy‑free / vegan: Choose vegan wafer cookies, dairy‑free chocolate chips, and vegan marshmallow creme or aquafaba meringue.
- Low sugar: Use sugar‑free wafer cookies and sugar‑free chocolate chips, and pipe ghosts with a sugar‑free meringue instead of marshmallow.
- Spiced ghosts: Stir a pinch of cinnamon and nutmeg into the white chocolate, or dust the finished ghosts lightly with pumpkin spice.
- Peanut butter twist: Spread a thin layer of peanut butter on each wafer before dipping for a candy‑bar vibe.
- Colorful ghosts: Tint the white chocolate with oil‑based candy color to make pastel ghosts, or just color the bases and keep the tops white.
- Monster mash: Use green or purple candy melts, candy corn “horns,” and mismatched eyes to turn some ghosts into silly monsters.
Ways to Serve Chocolate Dipped Ghost Wafer Cookies Recipe
- Stack them in a “haunted fence” around a bowl of fruit or caramel dip.
- Tuck one ghost cookie into each lunchbox as a Halloween surprise.
- Arrange them on a dessert board with sliced apples, pretzels, and popcorn.
- Stand them upright in crushed cookie “dirt” cups for a graveyard dessert.
- Wrap two or three in clear treat bags with ribbon for party favors or classroom treats.
Storage Success
Store Chocolate Dipped Ghost Wafer Cookies in a single layer or with parchment between layers in an airtight container. Keep the container at cool room temperature if your kitchen stays under about 72°F, or move it to the fridge in warmer weather. Eat them within 4–5 days for the best crunch and flavor, since wafers start to soften over time. If you chill them, let them sit at room temperature for 10–15 minutes before serving so the chocolate tastes smooth and the marshmallow softens slightly.
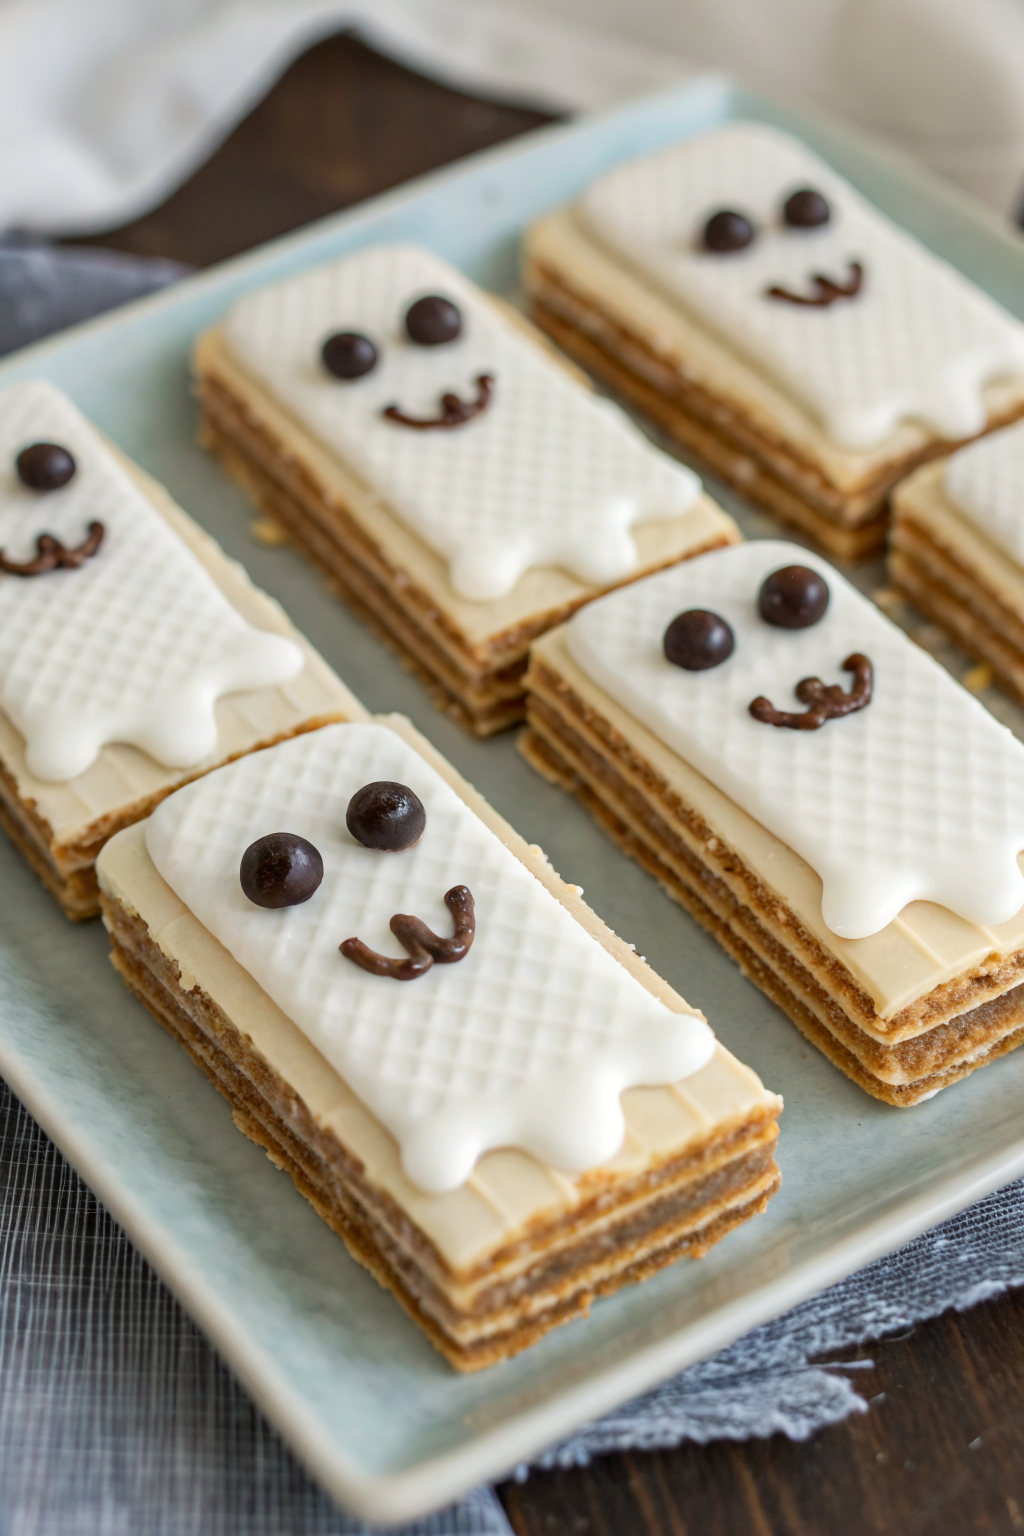
Chocolate Dipped Ghost Wafer Cookies Recipe
Ingredients
Instructions
- Line a baking sheet with parchment paper or a silicone mat and lay out the wafer cookies in a single layer.
- Place mini chocolate chips, candy eyes if using, and sprinkles in small bowls within easy reach.
- Add the white chocolate chips and about half of the oil to a microwave‑safe bowl.
- Microwave in 20–30 second bursts, stirring after each burst, until smooth and glossy.
- Stir in the vanilla extract and a small pinch of salt, and add a little more oil if the mixture seems too thick for dipping.
- Hold each wafer cookie at one end and dip it about three‑quarters of the way into the melted white chocolate.
- Let the excess chocolate drip back into the bowl, tapping your wrist gently to remove extra drips.
- Lay the dipped wafers on the prepared baking sheet, chocolate side up, and repeat with all the cookies.
- Spoon the marshmallow creme into a piping bag or a zip‑top bag and snip a small opening in the tip or corner.
- Pipe a fluffy blob of marshmallow near the top of each dipped wafer to form the ghost’s head and shoulders.
- Swirl the tip slightly as you lift it to create a wavy, ghost‑like top. Add a few mini marshmallows under the creme if you want extra height.
- Press two mini chocolate chips into the marshmallow on each cookie to make eyes while the topping is still sticky.
- Use another mini chip on its side for an open “O” mouth or draw expressions with black decorating gel or an edible marker.
- Add chocolate “hair,” sprinkle headbands, or other Halloween sprinkles as desired to give each ghost personality.
- Place the semisweet or milk chocolate chips in a clean microwave‑safe bowl with the remaining oil.
- Microwave in short bursts, stirring between each, until smooth.
- Transfer the melted chocolate to a piping bag or zip‑top bag and drizzle over the bottoms of the wafers, or dip just the base for a chocolate “shoe” effect.
- Chill the decorated cookies on the baking sheet in the refrigerator for 10–15 minutes, until the chocolate is firm and set.
- Once set, arrange the ghost wafer cookies on a serving platter and garnish the platter with extra sprinkles or crushed chocolate cookies if desired.
- Serve within a few hours for the best crunch, or store as directed in an airtight container until ready to enjoy.
Notes
Approximate per 1 cookie (based on 24 cookies, using standard wafers, white chocolate, semisweet chocolate, and marshmallow creme): 150 calories; fat 8 g; saturated fat 5 g; carbohydrates 19 g; fiber 0 g; sugars 14 g; protein 1 g; sodium 55 mg. Values will vary based on brands, exact amounts used, and decoration choices.
Leave a Reply