
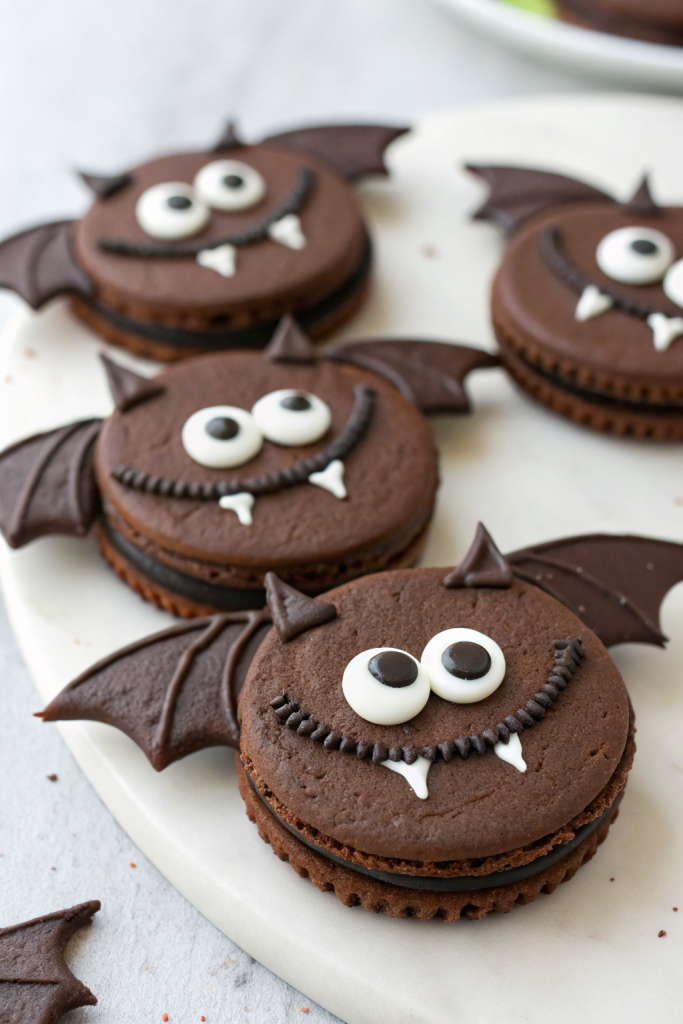
Cute Bat Oreos Recipe tastes like a crunchy chocolate cookie hugged by creamy frosting and dipped in rich chocolate, with just enough cuteness to make kids squeal and adults pretend they made them “for the kids.” This Halloween dessert works best for busy families, classroom parties, and anyone who wants a spooky treat in under 30 minutes. I tested these with my own nieces, and they disappeared so fast I had to hide a few in the back of the fridge.
Why Make This Cute Bat Oreos Recipe at Home
Homemade bat Oreos look way more adorable than anything from a store package, and you control the ingredients. You can use your favorite chocolate sandwich cookies, better quality chocolate, and fun toppings that match your party theme.
You also save money when you decorate a whole batch at once instead of buying individual themed treats. Kids love to help with this recipe, and the steps stay simple enough that you can keep your sanity while they “taste test” the candy eyes.
“These Cute Bat Oreos disappeared from the dessert table in minutes and everyone asked for the recipe, ★★★★★”
Ingredients You Need
Main ingredients
-
Oreo-style chocolate sandwich cookies
- Use classic Oreos or any store brand chocolate sandwich cookie.
- Double Stuf holds the wings a little better because the filling gives more grip.
-
Mini Oreos or mini chocolate sandwich cookies
- You use these as wings.
- Choose the regular chocolate flavor so the bats look consistent.
-
Chocolate for coating
- Use semisweet chocolate chips, dark chocolate chips, or candy melts.
- Candy melts set faster and look smoother, great for kids’ parties.
- If you use regular chocolate chips, add 1 teaspoon neutral oil per cup of chips for a shinier finish.
-
Candy eyes
- Any small candy eyes from the baking aisle work.
- If you cannot find them, use white chocolate chips and a dot of melted chocolate for pupils.
-
Optional decorations
- Halloween sprinkles
- Colored sanding sugar
- Small heart sprinkles for little fangs or noses
Pantry shortcuts and substitutions
- Use pre-made chocolate sandwich cookies so you skip baking.
- Use store-bought candy eyes instead of piping royal icing eyes.
- Swap chocolate coating with black candy melts if you want a deeper bat color.
- Use chocolate frosting as “glue” if your chocolate starts to set too quickly.
Equipment list
- Microwave-safe bowl or small heatproof bowl
- Spoon or small spatula
- Toothpicks or a fork for dipping
- Parchment paper or a silicone baking mat
- Baking sheet or large plate that fits in your fridge
- Small knife to split mini cookies for wings
Tips & Mistakes
- Use room temperature cookies so they do not crack when you press in the wings.
- Chill the finished bats on a parchment-lined tray so the chocolate sets cleanly and does not smear.
- Cut mini cookies in half gently with a small sharp knife; do not snap them apart or they break unevenly.
- Work in small batches so the chocolate stays melted and smooth while you dip.
- Add candy eyes while the chocolate still feels wet; if it sets, dab a tiny bit of melted chocolate as glue.
- Do not overheat chocolate in the microwave; heat in 20 to 30 second bursts and stir often to avoid scorching.
- Keep water away from the chocolate; even a drop can cause it to seize and turn grainy.
- Use a fork or toothpick to lift cookies from the chocolate so extra coating drips off and you avoid thick, clumpy bottoms.
How to Make Cute Bat Oreos Recipe
Step 1: Prep the bat wings
Place mini chocolate sandwich cookies on a cutting board.
Use a small sharp knife to cut each mini cookie in half through the filling so you get two curved “wings.”
If a cookie crumbles, snack on it and grab another one.
Set the wing pieces aside in pairs so you can grab them quickly.
Step 2: Melt the chocolate
Add chocolate chips or candy melts to a microwave-safe bowl.
Microwave in 20 to 30 second bursts, stirring well after each round, until the chocolate turns smooth and glossy.
Stir in 1 teaspoon neutral oil if the chocolate looks too thick for dipping.
Keep the bowl over a warm towel or near the stove so the chocolate stays fluid while you work.
Step 3: Dip the Oreo bodies
Line a baking sheet with parchment paper or a silicone mat.
Drop one Oreo cookie into the melted chocolate and spoon chocolate over the top until fully coated.
Lift the cookie out with a fork, tap the fork gently on the edge of the bowl to shake off extra chocolate, then slide the cookie onto the lined tray.
Repeat with more cookies, leaving a little space between each bat body.
Step 4: Attach the wings
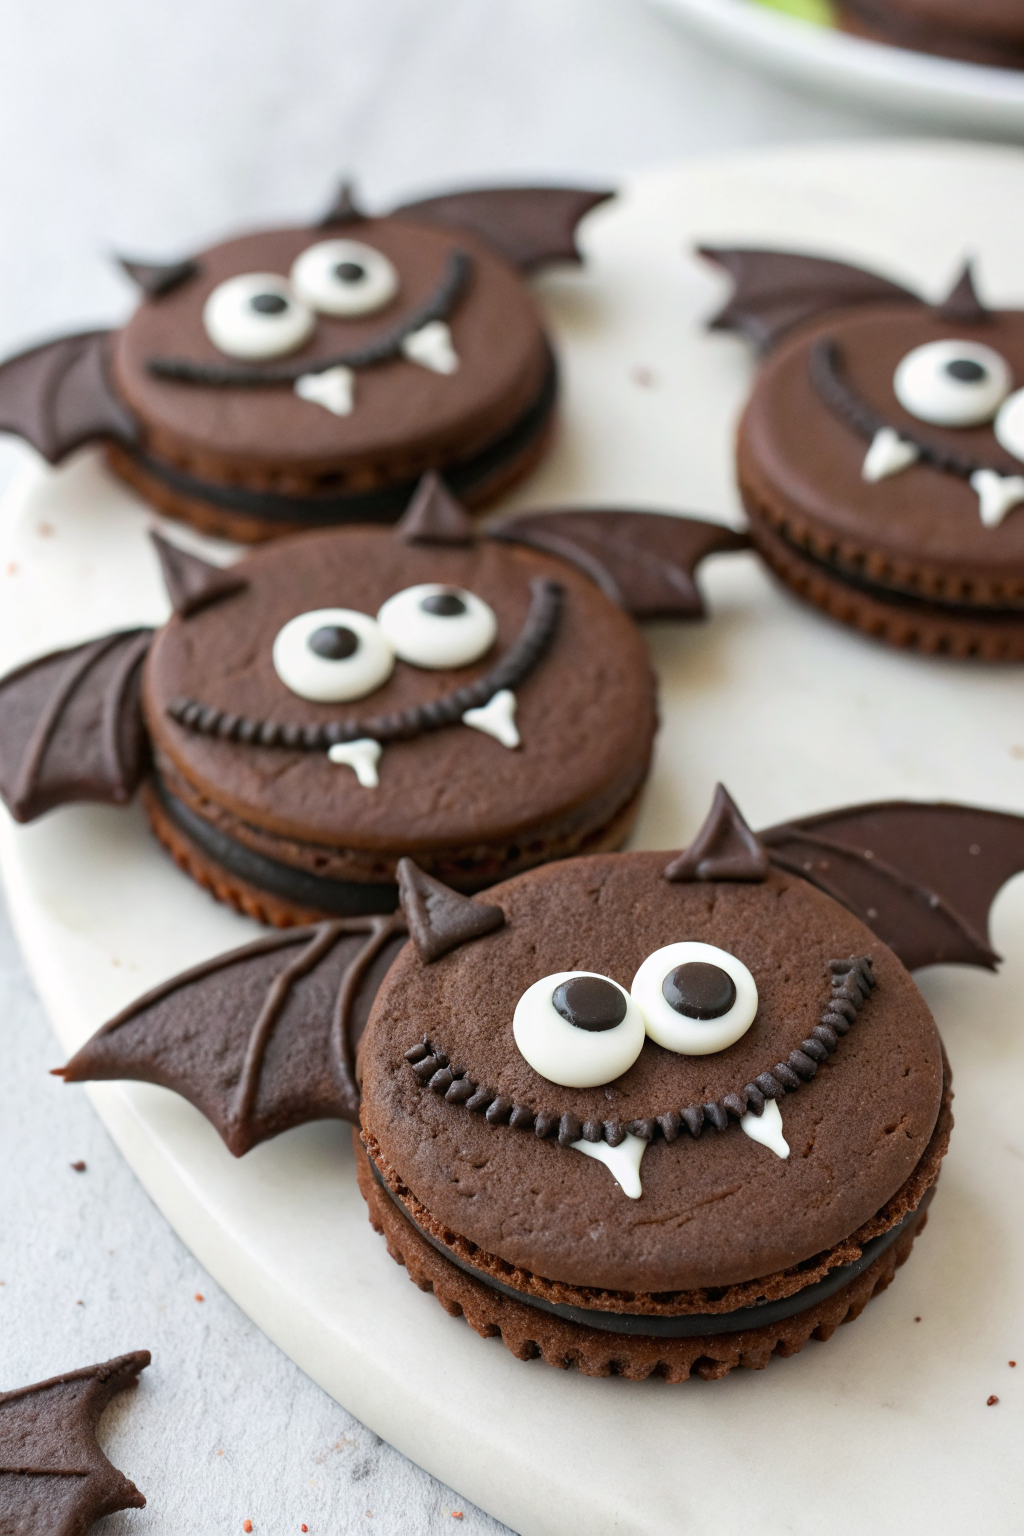
While the chocolate on each Oreo still feels wet, press two mini cookie halves into the sides to form wings.
Angle the wings slightly upward so the bats look like they fly, not nap.
Hold each wing for a second so it sticks into the soft chocolate.
If a wing droops, add a tiny dab of extra chocolate at the base for support.
Step 5: Add faces and details
Place two candy eyes on each bat near the top center of the cookie.
Gently press the eyes into the chocolate so they sit flat and stay in place.
Add a small sprinkle or heart candy under the eyes for a nose or tiny fangs if you like.
Work quickly so the chocolate stays soft while you decorate each bat.
Step 6: Chill and set
Transfer the tray of decorated Cute Bat Oreos to the fridge.
Chill for about 10 to 15 minutes until the chocolate feels firm to the touch.
Once set, peel each bat off the parchment and arrange them on a serving plate.
Keep them cool until serving so the chocolate holds its shape.
Variations I've Tried
I swapped regular Oreos with golden sandwich cookies and used purple candy melts for a bright, silly bat version.
I also tried peanut butter sandwich cookies and dipped them in dark chocolate, which tasted like a peanut butter cup in bat form.
One batch used orange candy melts with black sprinkles for a more classic Halloween color combo.
I even made a “mini bat family” with bite-size sandwich cookies as bodies and broken chocolate chips as tiny wings.
How to Serve Cute Bat Oreos Recipe
Serve Cute Bat Oreos on a big platter with other Halloween treats like caramel apples, popcorn, and fruit skewers.
Kids love them in lunchboxes or as an after-school snack with a cold glass of milk.
You can tuck a couple into treat bags for classroom parties or trunk-or-treat events.
Add them to a dessert board with brownies, rice cereal treats, and candy corn for a fun, spooky spread.
How to store
- Store Cute Bat Oreos in a single layer in an airtight container at room temperature for up to 3 days, or in the fridge for up to 1 week.
- If you stack them, place parchment between layers so the decorations do not smudge.
- Freeze in a firm single layer on a tray, then move to a freezer bag for up to 2 months.
- Thaw in the fridge so condensation does not form on the chocolate, and serve chilled or at cool room temperature.
Cute Bat Oreos Recipe
Ingredients
Instructions
- Place the mini chocolate sandwich cookies on a cutting board.
- Using a small sharp knife, carefully cut each mini cookie in half through the filling to create two curved wing pieces. If a cookie crumbles, set it aside for snacking and use a new one.
- Arrange the wing halves in pairs so they’re ready to grab quickly when assembling the bats.
- Add the chocolate chips or candy melts to a microwave-safe bowl.
- Microwave in 20–30 second bursts, stirring well after each interval, until the chocolate is completely melted, smooth, and glossy.
- If the chocolate seems too thick for dipping, stir in neutral oil, a little at a time, until it reaches a smooth, pourable consistency.
- Line a baking sheet or large plate with parchment paper or a silicone baking mat.
- Drop one Oreo-style cookie into the melted chocolate, spooning chocolate over the top until it is fully coated.
- Lift the cookie out with a fork or toothpick, gently tap it on the edge of the bowl to let excess chocolate drip off, then slide it onto the prepared tray.
- Repeat with the remaining cookies, leaving a little space between each bat body.
- While the chocolate on each dipped cookie is still wet, press two mini cookie halves into opposite sides to form wings.
- Angle the wings slightly upward so the bats look like they’re flying.
- Hold each wing in place for a moment so it sets into the soft chocolate. If any wing droops, add a small dab of extra melted chocolate or a bit of frosting at the base for support.
- Place two candy eyes on each bat near the top center of the cookie, gently pressing them into the wet chocolate so they sit flat and adhere.
- If desired, add a small heart sprinkle or other small sprinkle under the eyes for a nose or tiny fangs.
- Decorate with Halloween sprinkles or sanding sugar if you like, working quickly before the chocolate begins to set.
- Transfer the tray of decorated bat Oreos to the refrigerator.
- Chill for 10–15 minutes, or until the chocolate is firm to the touch.
- Once set, gently peel each bat off the parchment and arrange on a serving platter. Keep them cool until serving so the chocolate holds its shape.
Notes
Approximate per 1 bat Oreo (1 large sandwich cookie, 1 mini cookie, chocolate coating, and decorations): 210 calories; fat 11 g; saturated fat 6 g; carbohydrates 27 g; fiber 2 g; sugars 18 g; protein 2 g; sodium 110 mg. Values will vary based on cookie brand, type and amount of chocolate, and decorations used. Storage: Store Cute Bat Oreos in a single layer in an airtight container at room temperature for up to 3 days or in the fridge for up to 1 week. If stacking, separate layers with parchment so the decorations don’t smudge. For longer storage, freeze in a single layer until firm, then transfer to a freezer bag for up to 2 months. Thaw in the fridge to avoid condensation forming on the chocolate.
Leave a Reply