
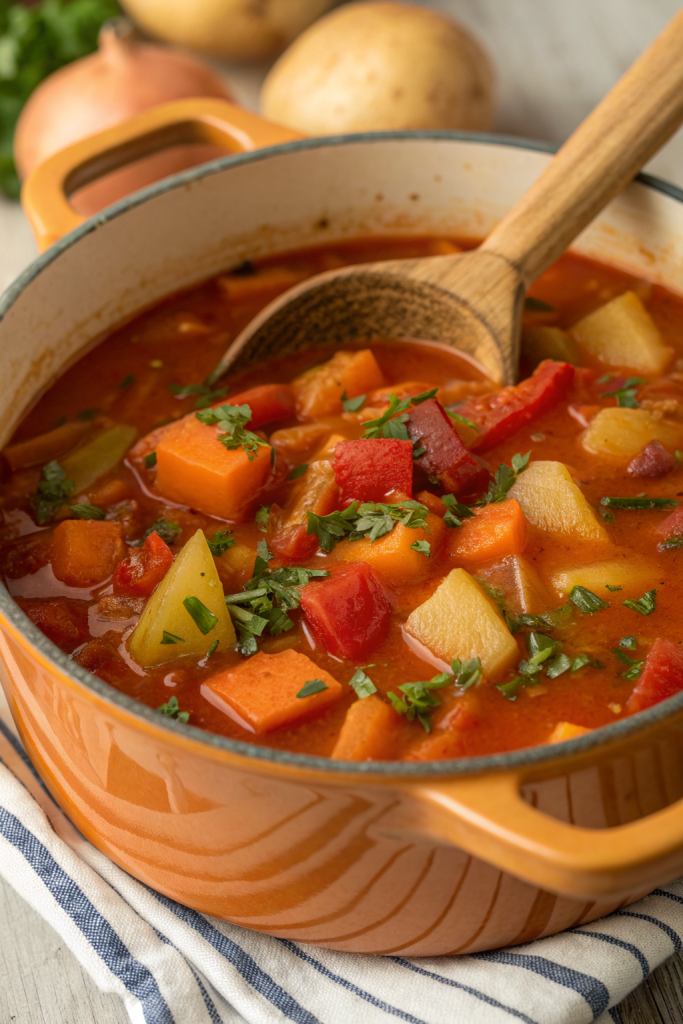
Fall Harvest Vegetable Soup Recipe tastes cozy and hearty, with sweet roasted squash, earthy root vegetables, and a little kick of spice that warms you from the inside out. It works well for busy weeknights or lazy Sundays, and you can get it on the table in about 50–60 minutes, start to finish. I first made a version of this soup in a tiny apartment kitchen with one wobbly burner, so if I pulled it off there, you can absolutely nail it at home.
Why Fall Harvest Vegetable Soup Recipe Is Worth It
This soup packs in fall vegetables, fiber, and plant-based protein, so it satisfies like a full meal and not just a starter. The broth tastes rich and slightly sweet from squash and carrots, with a savory backbone from onions, garlic, and herbs.
You can customize it with whatever you have in the crisper drawer, which saves money and cuts down on food waste. It also reheats beautifully, so one pot sets you up for several cozy lunches or dinners.
“This Fall Harvest Vegetable Soup Recipe tastes like a hug in a bowl and somehow gets better every time I reheat it. ★★★★★”
Ingredients You Need
Vegetables
- 2 tbsp olive oil (or avocado oil)
- 1 large yellow onion, diced
- 3 medium carrots, sliced into coins
- 2 celery stalks, sliced
- 1 small butternut squash, peeled and cubed (about 4 cups; you can use pre-cut squash from the produce section)
- 2 small Yukon gold potatoes, diced (leave skins on for more texture and nutrients)
- 1 small sweet potato, peeled and diced
- 1 red bell pepper, chopped
- 1 cup chopped green beans (fresh or frozen)
- 1 cup corn kernels (frozen works great; I use Cascadian Farm or store brand)
- 1 cup chopped kale or baby spinach, packed
- 1 small parsnip, diced (optional, but adds great sweetness)
Aromatics & Flavor
- 4 cloves garlic, minced
- 1-inch piece fresh ginger, grated (or 1 tsp ground ginger)
- 1–2 tbsp mild harissa paste (or 1–2 tsp smoked paprika if you want less heat)
- 1 tsp ground coriander
- 1 tsp ground turmeric
- 1 tsp dried thyme (or 1 tbsp fresh, chopped)
- 1 tsp dried oregano
- 2 bay leaves
- 1–2 tsp kosher salt, plus more to taste
- ½ tsp black pepper
- Pinch of red pepper flakes (optional, for extra heat)
Liquids
- 6 cups vegetable broth (use low-sodium; I like Better Than Bouillon vegetable base for pantry convenience)
- 1 cup water, as needed to thin
- 1 (14.5 oz) can fire-roasted diced tomatoes (or regular diced tomatoes)
Protein & Hearty Add-Ins
- 1 (15 oz) can chickpeas, drained and rinsed (or white beans, such as cannellini)
- ½ cup dry lentils, rinsed (brown or green; they hold their shape well)
- ½ cup small pasta shapes (like ditalini or small shells) or pearl barley (optional; skip for low-carb)
Finishers
- 2 tbsp chopped fresh parsley
- 1 tbsp lemon juice or apple cider vinegar (brightens the flavor at the end)
- Grated Parmesan or pecorino for serving (optional; skip for vegan)
- A drizzle of good olive oil on top (optional but tasty)
Equipment
- Large heavy-bottomed stock pot or Dutch oven (at least 6-quart)
- Cutting board and sharp chef’s knife
- Wooden spoon or heat-safe spatula
- Ladle
- Measuring cups and spoons
- Microplane or small grater for ginger and garlic (optional but handy)
Quick Tips & substitutions
- Use pre-cut butternut squash and pre-chopped mirepoix (onion, carrot, celery) to save time on busy nights.
- Swap chickpeas with white beans or black beans if that is what you have in the pantry.
- Use frozen mixed vegetables in place of fresh green beans and corn when your fridge looks bare.
- Choose low-sodium broth so you control the salt level and adjust at the end.
- Skip pasta or potatoes and add extra greens and beans for a lower-carb bowl.
- Stir in a spoonful of tomato paste with the spices if you want deeper tomato flavor.
- Add a splash of coconut milk at the end for a creamy, dairy-free version.
- Use smoked paprika instead of harissa if you cook for kids or anyone who avoids heat.
- Cut vegetables in similar sizes so they cook evenly and finish at the same time.
- Taste near the end of cooking and adjust salt, pepper, and acid so the flavors pop.
How to Make Fall Harvest Vegetable Soup Recipe
Step 1: Sauté veggies and aromatics
Heat oil in a large stock pot or Dutch oven over medium heat. Once hot, add onions and carrots; cook until soft, about 8 minutes. Stir in garlic, ginger, harissa, coriander, and turmeric; cook 2 minutes, until aromatic. Season with salt.
Step 2: Build the base
Add celery, bell pepper, parsnip, and butternut squash to the pot and stir well. Cook 5–6 minutes so the edges of the vegetables start to soften and pick up flavor from the spices. Sprinkle in thyme, oregano, bay leaves, black pepper, and red pepper flakes if you use them.
Pour in the diced tomatoes with their juices and stir to coat the vegetables. Add the lentils, chickpeas, potatoes, and sweet potato. Stir again so everything mixes evenly.
Step 3: Add broth and simmer
Pour in the vegetable broth and enough water to cover the vegetables by about ½–1 inch. Raise the heat to bring the soup to a gentle boil, then lower the heat to maintain a steady simmer. Partially cover the pot with a lid to keep some steam in while still allowing the soup to reduce a bit.
Simmer 25–30 minutes, stirring every few minutes, until lentils, potatoes, and squash turn tender. If the soup thickens too much, add a splash of water or broth. Taste and adjust salt as the flavors concentrate.
Step 4: Add pasta or grains (optional)
If you want pasta or barley, stir it into the simmering soup about 10–12 minutes before you plan to serve. Cook until the pasta or grains reach your preferred texture. Stir often during this stage so starches do not stick to the bottom of the pot.
If the soup thickens as the pasta or barley cooks, add another ½–1 cup of water or broth. Taste again and season with a pinch more salt if needed.
Step 5: Finish with greens and brightness
Stir in green beans, corn, and kale or spinach during the last 5–7 minutes of cooking. The greens should wilt and turn vibrant, and the green beans should stay slightly crisp-tender. Turn off the heat.
Remove bay leaves. Stir in lemon juice or apple cider vinegar and chopped parsley. Taste one last time and adjust seasoning so the broth tastes balanced and lively.
Step 6: Serve
Ladle the soup into warm bowls. Top with a drizzle of olive oil and a sprinkle of Parmesan or pecorino if you use dairy. Add extra parsley or a pinch of red pepper flakes for color and heat.
Serve with crusty bread, garlic toast, or a simple green salad. Take a second to enjoy the smell before you dive in, because that aroma carries half the magic.
Recipe Variations
- Gluten-free: Use gluten-free pasta or skip pasta and barley; double the lentils or beans instead.
- Vegan: Use vegetable broth and skip cheese; add nutritional yeast on top for a cheesy note.
- Low carb: Leave out potatoes, sweet potato, pasta, and barley; add extra leafy greens, mushrooms, and zucchini.
- Extra protein: Stir in cooked shredded chicken or turkey at the end, or add more beans and lentils.
- Creamy version: Swirl in ½–1 cup coconut milk or half-and-half near the end and heat gently.
- Smoky version: Add ½–1 tsp smoked paprika and a dash of liquid smoke.
- Herb twist: Swap parsley with fresh basil, dill, or cilantro, depending on what you have.
- Kid-friendly: Skip harissa and red pepper flakes, then serve hot sauce on the side for spice lovers.
Ways to Serve Fall Harvest Vegetable Soup Recipe
- Serve with warm crusty bread, cornbread, or garlic toast for dunking.
- Pair with a simple green salad with lemony dressing.
- Spoon over cooked brown rice, quinoa, or farro for an extra-hearty bowl.
- Top with shredded cheese, a dollop of Greek yogurt, or a swirl of pesto.
- Serve in mugs for a cozy couch dinner or game night.
Storage Success
Let the soup cool until it reaches room temperature, then transfer it to airtight containers. Store in the fridge for up to 4–5 days; the flavors deepen and taste even better on day two. The soup thickens as it sits, so add a splash of water or broth when you reheat it on the stove or in the microwave. Freeze portions for up to 3 months, label the containers, and thaw overnight in the fridge before reheating.
Leave a Reply