
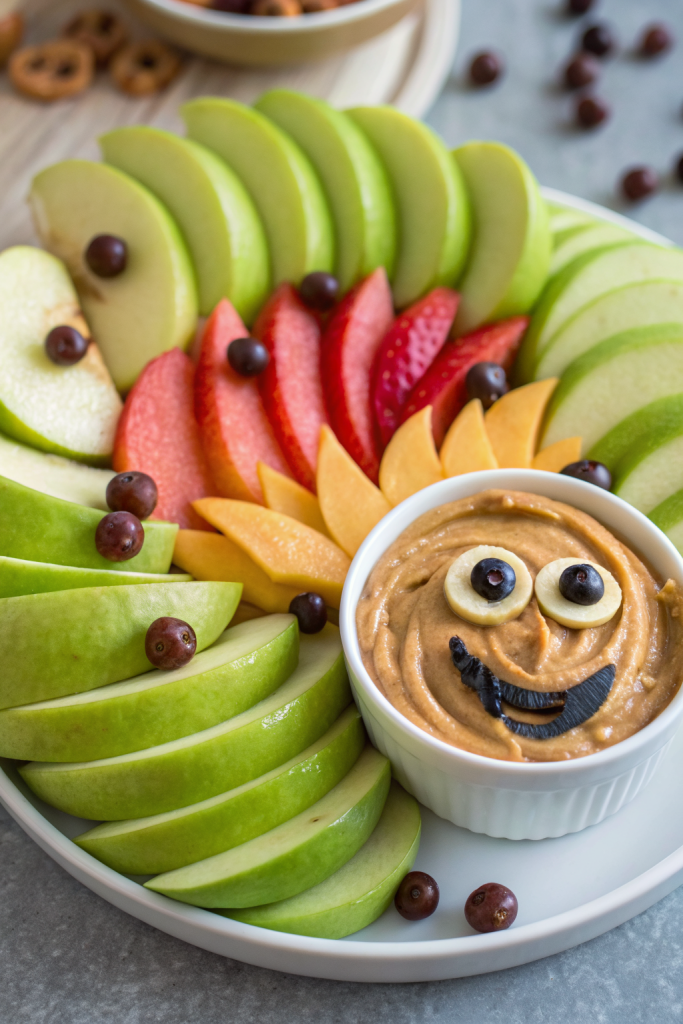
Halloween Fruit Platter Idea tastes bright, juicy, and just spooky enough to make kids squeal and adults snack way more than they admit. It works perfectly for busy hosts who want a 20–30 minute, no-bake Halloween party snack that still looks impressive on the table. I tested versions of this platter with my own kids, and they now judge all future Halloween snacks against “the fruit eyeballs plate.”
Why You Should Try This Halloween Fruit Platter Idea
This Halloween fruit platter idea gives you a colorful, fresh option in a sea of candy and frosting. It still feels fun and festive, but you balance all that sugar with something juicy and hydrating.
You also assemble it quickly, which helps a lot when you juggle costumes, school parties, and last‑minute pumpkin carving. You can prep most of it ahead, then arrange everything right before guests arrive.
“This Halloween fruit platter disappeared faster than the candy bowl and looked so cute that everyone took photos before eating it. ★★★★★”
Ingredients You’ll Need
Here is a flexible ingredient list for a big, party‑size Halloween fruit platter idea. Adjust amounts based on how many people you plan to feed and how large your platter or board is.
Base fruits (for color and volume):
- Seedless green grapes
- Seedless red or black grapes
- Fresh strawberries, hulled
- Blueberries
- Raspberries
- Blackberries
- Pineapple rings or chunks (fresh or canned in juice, not syrup)
- Cantaloupe or honeydew, sliced or balled
- Watermelon, sliced or cut with cookie cutters into shapes
“Spooky” accent fruits:
- Bananas (for ghost bananas)
- Navel oranges or clementines (for mini pumpkins)
- Kiwi (for monster eyes)
- Apples (for monster mouths; pick a crisp variety like Honeycrisp or Granny Smith)
- Pomegranate arils (for “blood” details)
Decoration extras:
- Mini dark chocolate chips (for eyes on banana ghosts)
- Candy eyeballs (optional but fun; use a brand you trust that holds up to moisture)
- Pretzel sticks (for pumpkin “stems”)
- Mini marshmallows (for teeth in apple monster mouths)
- Toothpicks or cocktail picks (for securing some details)
Pantry shortcuts and brand notes:
- Use pre‑cut fruit trays from the store if you feel short on time, then just rearrange them into Halloween shapes.
- Canned pineapple and mandarin oranges in juice work great when fresh fruit costs more or looks sad.
- Use chocolate chips or raisins instead of candy eyeballs if you want a more natural platter.
Substitutions:
- Swap any berries with what looks best at your store, like cherries or sliced plums.
- Use dairy‑free chocolate chips and gelatin‑free marshmallows to keep the platter friendly for more guests.
- Replace bananas with peeled pears if you need fruit that holds longer without browning.
Equipment list:
- Large platter, cutting board, or sheet pan
- Small bowls or ramekins for dips and loose items
- Sharp chef’s knife and small paring knife
- Cutting board
- Paper towels or clean kitchen towel
- Small cookie cutters (pumpkin, bat, ghost shapes)
- Optional: small squeeze bottle or spoon for drizzling melted chocolate or fruit dip
Tips & Tricks
- Pat fruit dry before arranging so it does not slide around and the platter stays neat.
- Use the largest fruit pieces first to outline shapes like pumpkins, ghosts, or a big skull, then fill gaps with berries and grapes.
- Keep bananas and apples for last, and brush cut surfaces with lemon or orange juice to slow browning.
- Build height by stacking fruit in small mounds instead of one flat layer, which makes the platter look fuller.
- Group colors together for impact, like a full orange “pumpkin” corner and a dark “graveyard” corner with blackberries and grapes.
- Place candy eyeballs and chocolate chips right before serving so moisture does not melt or smudge them.
- Use small bowls in the corners for dips like vanilla yogurt, chocolate hummus, or peanut butter yogurt dip.
- Wrap the finished platter loosely with plastic wrap and chill it until party time to keep everything crisp.
- Set tongs or small spoons around the platter so guests can serve themselves without handling every piece.
- Snap a quick photo before guests arrive, because this platter tends to vanish quickly.
How to Make Halloween Fruit Platter Idea
Step 1: Prep and slice the fruit
Wash and dry all fruit very well, then spread it on clean towels so excess water drips off. Hull strawberries, pull grapes from stems, and slice melons into wedges or use a melon baller. Slice apples and kiwi, peel bananas, and peel clementines or oranges.
Cut watermelon and melon into fun shapes with cookie cutters if you want extra Halloween flair. Keep all cut fruit in separate bowls so colors and juices do not mix too much.
Step 2: Build the base layer on the platter
Place small bowls or ramekins on your board first where you want dips or “eye” clusters. Add a generous layer of grapes and melon around the bowls to cover most of the surface. Tuck strawberries and pineapple chunks into open spaces to build a colorful base.
Keep the outer edges neat with larger pieces like watermelon slices and orange wedges. Leave a few open “zones” where you plan to add ghost bananas, orange pumpkins, or a skull shape.
Step 3: Make banana ghosts
Cut bananas in half crosswise so each piece stands upright or lays flat like a little ghost. Press two mini chocolate chips or candy eyeballs into each banana piece for eyes, and add a third chip for a mouth if you want. Work gently so you do not split the banana.
Arrange the banana ghosts together in one corner or along one side so they look like a spooky crowd. Drizzle a tiny bit of lemon juice over them to slow browning, but do not soak them.
Step 4: Make orange “pumpkins”
Peel clementines or small oranges, keeping each fruit whole and segments attached. Push a small piece of pretzel stick into the top center of each orange to look like a pumpkin stem. If you use full‑size oranges, slice them into thick rounds and stack them slightly.
Cluster these orange “pumpkins” together in one area of the platter. Add a few green grapes or kiwi slices around them to look like leaves and vines.
Step 5: Make apple monster mouths
Slice apples into quarters, then cut out the core from each piece. Cut a wedge from the skin side of each quarter to form an open “mouth.” Brush the cut surfaces with lemon or orange juice.
Press mini marshmallows along one cut edge to look like teeth. Add a small smear of peanut butter, sunflower seed butter, or chocolate spread inside the mouth if you want extra flavor. Place candy eyeballs or chocolate chips above the mouth, using a tiny dab of nut butter to help them stick.
Step 6: Add monster eyes and creepy clusters
Slice kiwi into thick rounds and place a blueberry or grape half in the center of each slice to look like a big eyeball. Use a tiny bit of honey or nut butter if you need the “pupil” to stay in place. Arrange these kiwi eyes in a cluster on the platter.
Sprinkle pomegranate arils around darker fruit sections to look like scattered “jewels” or drops. Tuck a few candy eyeballs into berry piles so guests feel like something watches them from the fruit.
Step 7: Fill gaps and finish details
Look for any empty spots and fill them with raspberries, blueberries, or extra grapes. Keep colors balanced so no section looks too heavy or too bare. If you use dips, swirl the tops with a spoon and add a few berries or sprinkles on top.
Step back and check the overall Halloween fruit platter idea. Adjust a few pieces so the shapes read clearly, then chill the platter until you serve it.
What to Serve with Halloween Fruit Platter Idea
Serve this Halloween fruit platter idea with simple, kid‑friendly snacks like popcorn, veggie sticks with ranch, and cheese cubes. Add a couple of fun dips near the fruit, such as vanilla yogurt, chocolate hummus, or a cinnamon yogurt dip. Offer drinks like apple cider, hot cocoa, or flavored sparkling water so guests can sip something cozy.
If you host a full party, pair the platter with mini sandwiches, quesadillas, or baked chicken tenders. The fruit cuts through heavier snacks and keeps everyone happy until trick‑or‑treat time.
Storage Options
- Cover leftover fruit tightly and store it in the fridge for up to 2 days, keeping bananas and apple monsters separate since they soften faster.
- Keep candy eyeballs and marshmallows in a dry container at room temperature, then add fresh ones when you serve leftovers.
- Avoid freezing the assembled platter, because most fresh fruit turns mushy after thawing.
- If you want to prep ahead, cut sturdier fruit like melon, pineapple, and grapes up to 1 day early, store them in airtight containers, then slice bananas and apples and decorate everything right before serving.
Halloween Fruit Platter Idea
Ingredients
Instructions
- Wash and dry all fruit very well, spreading it on clean towels so excess moisture can drip off.
- Hull strawberries, pull grapes from stems, and slice melons into wedges or scoop into balls. Slice apples and kiwi, peel bananas, and peel clementines or small oranges, keeping them whole.
- If desired, cut watermelon and melon into fun Halloween shapes using small cookie cutters. Keep each type of fruit in separate bowls so colors and juices do not mix too much.
- Place any small bowls or ramekins for dips on your platter or board first to mark where they will go.
- Scatter a generous layer of grapes and melon around the bowls to cover most of the surface. Tuck strawberries and pineapple chunks into open spaces to create a colorful base.
- Neaten the outer edges with larger pieces like watermelon slices or orange rounds, leaving a few clear zones where you will add ghosts, pumpkins, and monster faces.
- Cut each banana in half crosswise so each piece can stand upright or lie flat like a small ghost.
- Press two mini chocolate chips or candy eyeballs into each banana piece for eyes, and add a third chip for a mouth if you like, working gently to avoid splitting the banana.
- Arrange the banana ghosts together in one section of the platter. Lightly drizzle or brush with a little lemon juice to slow browning, without soaking them.
- Peel clementines or small oranges so the segments stay attached in whole rounds.
- Push a small piece of pretzel stick into the top of each orange to create a pumpkin-style stem.
- Cluster the orange pumpkins together on the platter and add a few green grapes or kiwi slices around them to look like leaves and vines.
- Slice apples into quarters and cut out the core from each piece.
- From the skin side of each quarter, cut a shallow wedge to form an open mouth shape. Brush all cut surfaces with lemon or orange juice to help prevent browning.
- Press mini marshmallows along one cut edge inside the mouth to look like teeth. Add a small smear of peanut butter, sunflower seed butter, or chocolate spread inside for flavor, if desired.
- Attach candy eyeballs or chocolate chips above the mouth, using a tiny dab of nut butter or honey to help them stick, and arrange the monster mouths in their own section of the platter.
- Slice kiwi into thick rounds and place a blueberry or grape half in the center of each slice for a pupil, using a touch of honey or nut butter if needed to keep it in place.
- Cluster the kiwi monster eyes on the board, then sprinkle pomegranate arils around darker fruit sections to mimic scattered jewels or drops.
- Tuck a few candy eyeballs into piles of berries or grapes so it looks like the fruit is watching from the shadows.
- Fill any remaining gaps with raspberries, blueberries, or extra grapes, keeping color clusters balanced so no section looks too empty or too crowded.
- If using dips, smooth and swirl the tops in their bowls and add a few berries or sprinkles for decoration.
- Step back and adjust any shapes so the ghosts, pumpkins, and monster faces read clearly. Lightly cover the platter with plastic wrap and chill until serving time, then set out with small tongs or spoons so guests can help themselves.
Notes
Approximate per serving (1/12 of platter): 130–170 calories; fat 2 g; saturated fat 1 g; carbohydrates 33 g; fiber 4 g; sugars 24 g; protein 2 g; sodium 15 mg. Values will vary based on exact fruit types, candy decorations, and portion size.