
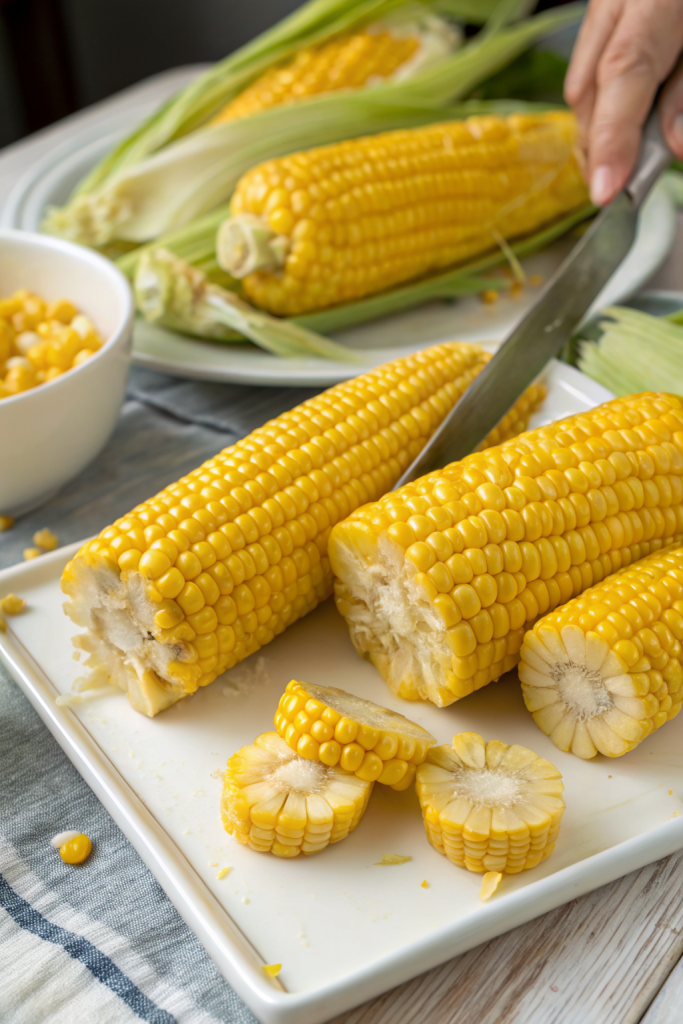
How to Freeze Corn on The Cob tastes like peak-summer sweetness in the middle of winter, with juicy kernels that still pop when you bite into them. It works perfectly for busy home cooks who want fresh-tasting corn year-round with only about 30–45 minutes of hands-on time. I grew up in the Midwest with corn stands on every corner, so I take this stuff a little too seriously… in a good way.
Why Freeze Corn on The Cob Is Worth It
Freezing corn on the cob locks in that just-picked sweetness that canned corn never quite matches. You control the salt, texture, and portion size, so weeknight dinners feel easier and fresher.
You also save money when you buy corn in peak season and stash it away. Future you will high-five present you when you pull out a bag of golden cobs in January.
“This method keeps the corn so sweet and crisp that my family swore I used fresh ears in the middle of winter. ★★★★★”
Ingredients You Need
- Fresh corn on the cob
- Choose ears with bright green husks, moist silk, and firm, plump kernels.
- Yellow, white, or bicolor corn all work well.
- Kosher salt (optional, for blanching water)
- I like Diamond Crystal because it dissolves quickly and tastes clean.
- Ice
- You need a big bowl of ice water to chill the corn fast.
- Water
- Enough to fill a large pot so the ears submerge fully.
Optional add-ons (use only if you plan to cut kernels off the cob before freezing):
- Unsalted butter (to toss with kernels before freezing, optional)
- Black pepper or your favorite seasoning blend (optional, go light so you keep versatility)
Equipment list:
- Large stock pot or Dutch oven
- Large bowl for ice bath
- Tongs
- Sharp chef’s knife (if cutting kernels off)
- Cutting board with a groove or a rim (helps catch runaway kernels)
- Clean kitchen towels or paper towels
- Baking sheet (for pre-freezing)
- Parchment paper (helps prevent sticking)
- Freezer-safe bags or containers (I like quart-size zip-top freezer bags)
- Permanent marker for labeling
Quick Tips & substitutions
- Choose corn that feels heavy for its size and has tight, bright husks.
- Use frozen ice packs in the ice bath if your ice supply runs low.
- Skip the salt in blanching water if you watch sodium; the corn still tastes sweet.
- Cut kernels off the cob before freezing if you have a small freezer; it saves space.
- Use reusable silicone freezer bags if you avoid single-use plastic.
- Label each bag with date and quantity so you track what you use.
- Freeze in meal-size portions so you avoid thawing more corn than you need.
- Keep blanching time short so the kernels stay crisp and don’t turn mushy.
How to Freeze Corn on The Cob
Step 1: Prep the corn
Peel back the husks and remove all the silk from each ear. Snap off the stem ends so the ears fit better in the pot. Rinse the corn under cool water to wash away any stray silk or field dust.
Step 2: Set up blanching and ice bath
Fill a large stock pot about three-quarters full with water and bring it to a rolling boil over high heat. Add a tablespoon or two of kosher salt if you want a little seasoning. While the water heats, fill a large bowl with cold water and plenty of ice so it feels very cold to the touch.
Step 3: Blanch the corn
Carefully lower the ears into the boiling water, working in batches so you avoid crowding. Boil small ears for about 3 minutes and large ears for about 4 minutes; the kernels should look brighter and slightly more opaque. Stir once or twice so all sides heat evenly.
Step 4: Shock in an ice bath
Use tongs to lift the hot ears straight into the ice water. Submerge the corn fully so the cold water stops the cooking quickly. Keep the ears in the ice bath until they feel completely chilled, about the same time as the blanching step or a little longer.
Step 5: Dry the corn
Transfer the cooled ears to a clean kitchen towel or paper towels. Pat each ear dry thoroughly so no water beads remain on the surface. Dry corn freezes better and avoids icy buildup.
Step 6: Choose cob-on or cut kernels
Decide if you want to freeze whole ears or loose kernels. Whole ears work well for grilling or boiling later, while kernels work better for soups, salads, and casseroles. You can split the batch and do both styles.
Step 7: Freeze whole ears of corn on the cob
Line a baking sheet with parchment paper. Arrange the dried ears in a single layer with a little space between each one. Place the tray in the freezer until the ears feel solid, about 1–2 hours, then pack them into freezer bags, press out extra air, seal, and label.
Step 8: Cut kernels and freeze off the cob
Stand one ear upright on a cutting board and slice downward with a sharp knife, cutting close to the cob but not into it. Rotate the ear and repeat until you remove all the kernels, then break up any big clumps with your fingers. Spread kernels in a single layer on a parchment-lined baking sheet, freeze until firm, then transfer to labeled freezer bags and press out the air.
Step 9: Store and use
Stack the sealed bags flat in the coldest part of your freezer, usually near the back. Use frozen corn on the cob within 8–10 months for best flavor. Use kernels straight from frozen in soups, stir-fries, and sautés, or thaw briefly in the fridge for salads and salsas.
Recipe Variations
- Gluten-free: Use plain corn and season with gluten-free spice blends only.
- Dairy-free / vegan: Skip butter when tossing kernels; use olive oil or avocado oil if you want a light coating.
- Low carb focus: Use smaller portions of corn and mix with lower-carb veggies like zucchini or bell peppers.
- Herb lovers: Toss cut kernels with a tiny pinch of dried thyme or smoked paprika before freezing for subtle flavor.
- Spicy version: Add a light sprinkle of chili powder or chipotle powder to kernels before freezing.
- Grilling fans: Slightly under-blanch ears by 1 minute so they hold up better to high grill heat later.
Ways to Serve
- Boil frozen ears, then brush with butter, salt, and a squeeze of lime.
- Sauté frozen kernels with garlic, green onion, and a little butter for a quick side.
- Stir kernels into chowders, chili, or vegetable soup.
- Toss thawed kernels into pasta salads, grain bowls, or taco fillings.
- Mix kernels with black beans, tomato, cilantro, and lime for a quick corn salad.
- Add kernels to breakfast scrambles or omelets for a sweet pop.
Storage Success
Store frozen corn on the cob or kernels in well-sealed freezer bags or containers in the coldest part of your freezer. Keep the air space small so ice crystals stay minimal and texture stays crisp. Use a marker to label each bag with the date and style (ears or kernels), then use the oldest bags first. Aim to enjoy your frozen corn within about 8–10 months for the best flavor and texture.

How to Freeze Corn on The Cob
Ingredients
Instructions
- Prep the corn by peeling back the husks and removing all the silk from each ear. Snap off the stem ends so the ears fit in your pot, then rinse under cool water to remove any remaining silk or field dust.
- Set up the blanching pot by filling a large stock pot about three-quarters full with water. Bring to a rolling boil over high heat. Add the kosher salt if using for light seasoning.
- Prepare an ice bath by filling a large bowl with cold water and plenty of ice so the water feels very cold to the touch. Keep additional ice nearby if you need to refresh it.
- Blanch the corn by carefully lowering several ears into the boiling water, working in batches to avoid crowding. Boil small ears for about 3 minutes and large ears for about 4 minutes, stirring once or twice so all sides heat evenly. The kernels should look brighter and slightly more opaque.
- Shock the corn in the ice bath. Use tongs to transfer the hot ears directly into the ice water. Submerge completely to stop the cooking quickly. Chill until the ears feel fully cold, about the same length of time as the blanching step or slightly longer.
- Dry the corn thoroughly. Move the cooled ears to a clean kitchen towel or paper towels and pat each ear dry until no water beads remain on the surface. This helps prevent ice buildup during freezing.
- Decide whether to freeze corn on the cob or as cut kernels. Whole ears are great for future boiling or grilling, while kernels work best for soups, salads, casseroles, and sautés. You can divide the batch and prepare both styles.
- To freeze whole ears, line a baking sheet with parchment paper. Arrange the dried ears in a single layer with space between them. Freeze until solid, 1 to 2 hours, then transfer the frozen ears to freezer-safe bags. Press out as much air as possible, seal, and label with the date and quantity.
- To cut kernels off the cob, stand one ear upright on a cutting board and slice downward with a sharp knife, cutting close to but not into the cob. Rotate the ear and repeat until all kernels are removed, then break up any large clumps with your fingers.
- If seasoning cut kernels, toss them lightly with melted butter and a small amount of black pepper or your preferred seasoning blend, if using. Keep the seasoning light so the corn stays versatile for different recipes.
- Freeze cut kernels by spreading them in a single layer on a parchment-lined baking sheet. Freeze until firm, then transfer the kernels to freezer bags, press out the air, seal, and label with the date and quantity.
- Store the sealed bags stacked flat in the coldest part of your freezer, usually near the back. For the best flavor and texture, use frozen corn on the cob or kernels within 8 to 10 months. Use kernels directly from frozen in hot dishes, or thaw briefly in the refrigerator for salads and salsas.
Notes
Approximate per 1 ear (about 90 g) plain blanched corn, without butter or added seasoning: 80–90 calories; fat 1 g; saturated fat 0 g; carbohydrates 19 g; fiber 2 g; sugars 6 g; protein 3 g; sodium 0–150 mg depending on salted blanching water. Values are estimates and will vary based on corn size, variety, and any added butter or seasonings.
Leave a Reply