
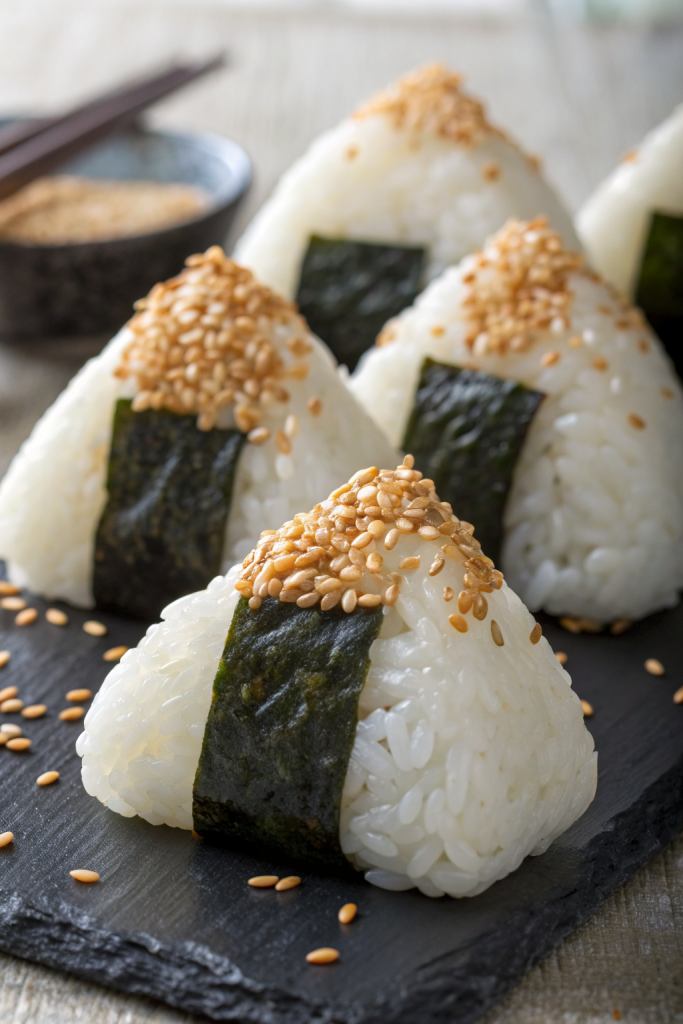
How to Make Tuna Mayo Onigiri Recipe tastes like a savory, creamy sushi roll that fits in your hand and waits patiently in your lunchbox without getting soggy. It works perfectly for busy students, office lunches, road trips, or anyone who wants a quick Japanese comfort snack in under 45 minutes. I started packing these in my own work lunches a decade ago, and I still feel a tiny spark of joy every time I bite into that salty, creamy center.
Why Make This How to Make Tuna Mayo Onigiri Recipe at Home
Homemade tuna mayo onigiri tastes fresher, costs less, and lets you control the salt, spice, and richness. You choose the tuna quality, the mayo brand, and how much filling you tuck inside, so every rice ball hits your exact comfort-food zone.
You also avoid soggy convenience store rice and mystery fillings. Once you learn the basic method, you can prep a batch for the week, pack them in lunches, or keep them in the freezer for instant snacks.
“This How to Make Tuna Mayo Onigiri Recipe tastes just like a Japanese convenience store classic, only fresher, creamier, and way more satisfying to eat at home. ★★★★★”
Ingredients You Need
Rice and Seasoning
-
Japanese short-grain rice
- Use sushi rice or labeled "short-grain Japanese rice."
- Avoid long-grain or jasmine rice; they stay too loose and do not hold shape.
- Plan about 2 cups uncooked rice to make 8 to 10 medium onigiri.
-
Water
- Use the amount your rice cooker or package suggests.
- Rinse the rice until the water runs mostly clear to remove extra starch.
-
Rice seasoning (optional but tasty)
- Salt: fine sea salt or kosher salt.
- Rice vinegar: 1 to 2 tablespoons for a subtle sushi-rice style flavor.
- Sugar: 1 teaspoon if you add vinegar, to balance the tang.
- Furikake: optional sprinkle for extra umami and crunch.
Tuna Mayo Filling
-
Canned tuna
- Use tuna in water for a lighter filling or tuna in oil for richer flavor.
- I like a good quality chunk light or skipjack tuna for a softer texture.
- Drain well so the filling does not leak into the rice.
-
Japanese mayonnaise
- Kewpie mayo gives the classic flavor with a richer, eggier taste.
- Use regular American mayo if that is what you have; add a tiny pinch of sugar to mimic Kewpie.
-
Soy sauce
- Use regular or light soy sauce.
- Add just enough to season the tuna without making it watery.
-
Seasonings
- Salt and pepper to taste.
- Optional: a few drops of sesame oil for nutty aroma.
- Optional: finely chopped green onion or chives for freshness.
- Optional: a tiny bit of wasabi or sriracha if you like a gentle kick.
Nori and Extras
-
Nori sheets
- Use full sheets of roasted seaweed and cut into strips or rectangles.
- I like standard sushi nori; seasoned nori also works if you enjoy extra flavor.
-
Sesame seeds (optional)
- Toasted white or black sesame seeds add a nice crunch on the outside.
Equipment List
- Rice cooker or a medium saucepan with lid
- Mixing bowls
- Fork or small spatula for flaking tuna
- Measuring spoons and cups
- Small bowl of salted water for dipping your hands
- Onigiri mold (optional) or just your hands
- Sharp knife or kitchen scissors to cut nori
Tips & Mistakes
- Use Japanese short-grain rice; other rice types fall apart and frustrate you.
- Rinse rice until the water looks mostly clear so the grains stay sticky but not gluey.
- Let cooked rice cool until warm, not hot, or it can burn your hands and steam the filling.
- Season the tuna mixture lightly at first, then taste and adjust; soy sauce can overpower quickly.
- Drain tuna very well so the filling stays creamy, not watery.
- Keep a small bowl of salted water nearby and dip your hands before shaping to prevent sticking and to season the surface.
- Do not overfill the center or the rice will split and the filling will peek out.
- Press the rice gently but firmly; loose onigiri crumble, and overpacked ones feel dense.
- Add nori right before eating if you want it crisp; add it earlier if you enjoy a softer wrap.
- Pack onigiri in a lunchbox with an ice pack and eat within a few hours for best texture and safety.
How to Make How to Make Tuna Mayo Onigiri Recipe
Step 1: Cook and Season the Rice
Rinse 2 cups of Japanese short-grain rice under cold water, swishing with your hand, and drain several times until the water looks mostly clear. Cook the rice in a rice cooker or saucepan with the correct amount of water. When the rice finishes cooking, let it sit covered for 10 minutes so the moisture distributes evenly.
Transfer the hot rice to a wide bowl and fluff gently with a rice paddle or spatula. If you want lightly seasoned rice, drizzle 1 to 2 tablespoons rice vinegar, 1 teaspoon sugar, and a pinch of salt over the rice. Fold gently so you do not crush the grains, then let the rice cool until warm and comfortable to touch.
Step 2: Mix the Tuna Mayo Filling
Drain 1 to 2 cans of tuna very well and place the tuna in a small bowl. Flake it with a fork until it breaks into small pieces. Add 3 to 4 tablespoons Japanese mayo, 1 to 2 teaspoons soy sauce, and a small pinch of salt and pepper.
Stir until the tuna looks creamy and evenly coated. Taste and adjust seasoning; add a few drops of sesame oil or a bit of green onion if you like. You want a thick, scoopable mixture that holds shape on a spoon.
Step 3: Set Up a Shaping Station
Fill a small bowl with water and stir in a pinch of salt. This salted water keeps rice from sticking to your hands and adds a light seasoning to the outside. Place the warm rice, tuna filling, and nori sheets nearby so you can work quickly.
Cut nori into strips or rectangles that fit around the bottom or side of each onigiri. If you use an onigiri mold, keep it close and ready. Line a tray or plate with parchment or a clean towel to hold finished rice balls.
Step 4: Shape the Onigiri by Hand
Scoop a small handful of warm rice into your palm, about 1/3 to 1/2 cup. Flatten it gently into a thick disc. Place 1 to 2 teaspoons of tuna mayo in the center.
Scoop a bit more rice on top to cover the filling. Cup your hands and start to form a triangle: press the top corner with one hand and the bottom corners with the other, rotating the rice ball as you go. Use gentle but firm pressure so the rice sticks together without turning into a brick.
Step 5: Use an Onigiri Mold Instead
If you prefer a mold, wet the inside lightly with salted water. Fill the mold halfway with rice, press a small indentation in the center, and add a spoonful of tuna mayo. Cover with more rice until the mold fills.
Place the lid on and press down firmly to compact the rice. Release the onigiri onto your tray. Adjust the edges with wet hands if needed to smooth any cracks.
Step 6: Add Nori and Finishing Touches
Wrap a strip or rectangle of nori around the bottom or side of each onigiri. Press gently so the rice grips the seaweed. If you like, sprinkle a few sesame seeds or a little furikake on the outside.
If you plan to eat them later, you can keep the nori separate and wrap it right before eating so it stays crisp. Pack the onigiri in a container, keep them cool, and enjoy within a few hours for best flavor and texture.
Variations I've Tried
-
Spicy tuna mayo onigiri
- Stir in sriracha, gochujang, or a bit of chili crisp with the mayo.
- Add finely chopped green onion for freshness and color.
-
Corn and tuna mayo
- Mix in a spoonful of canned corn kernels with the tuna filling.
- Kids usually love this slightly sweet, creamy combo.
-
Shiso tuna mayo
- Add finely sliced shiso leaves or a little perilla leaf to the filling.
- This version tastes bright and herbal and pairs nicely with plain rice.
-
Cheesy tuna mayo
- Mix in a small amount of shredded mild cheese with the tuna.
- The cheese softens slightly inside and gives a cozy, snacky vibe.
-
Brown rice tuna onigiri
- Use short-grain brown rice and cook it a bit softer than usual.
- The texture feels heartier, and it still holds shape if you cook it correctly.
How to Serve How to Make Tuna Mayo Onigiri Recipe
Serve tuna mayo onigiri at room temperature or slightly warm for the best texture and flavor. Pair them with miso soup, a simple cucumber salad, or sliced fruit for a balanced meal. Pack them in bento boxes with edamame, cherry tomatoes, and a small container of soy sauce if you like extra seasoning. Enjoy them as a quick breakfast, lunch, snack, or late-night bite when you want comfort food without much effort.
How to store
- Room temperature: Keep tuna mayo onigiri at cool room temperature for up to 4 hours only, since the filling contains mayo and fish.
- Fridge: Wrap each onigiri tightly in plastic wrap, place in an airtight container, and refrigerate up to 2 days; expect the rice to firm up a bit.
- Freezer: Wrap each one in plastic, then place in a freezer bag, press out air, and freeze up to 1 month; skip the nori and add it after reheating.
- Reheating: Thaw frozen onigiri in the fridge, then warm gently in the microwave, covered with a damp paper towel, in short bursts until just warm; add fresh nori right before eating so it stays pleasant.
How to Make Tuna Mayo Onigiri Recipe
Ingredients
Instructions
- Rinse the Japanese short-grain rice under cold water, swishing with your hand and draining several times until the water runs mostly clear.
- Cook the rice in a rice cooker or saucepan with the appropriate amount of water according to package or cooker instructions.
- When the rice is done, let it rest covered for 10 minutes so the moisture distributes evenly.
- Transfer the hot rice to a wide bowl and gently fluff with a rice paddle or spatula. If desired, drizzle rice vinegar, sugar, and a pinch of salt over the rice and fold gently to season. Let the rice cool until it is warm and comfortable to handle.
- Drain the canned tuna very well and place it in a small bowl. Flake the tuna with a fork into small pieces.
- Add Japanese mayonnaise, soy sauce, a pinch of salt and black pepper, and stir until the tuna is creamy and evenly coated.
- Taste and adjust seasoning, adding sesame oil, green onion, or a little wasabi or sriracha if you like a kick. The mixture should be thick and scoopable, not runny.
- Fill a small bowl with water and stir in salt to make lightly salted water for your hands.
- Arrange the warm rice, tuna mayo filling, and sliced nori sheets near your work area. Line a tray or plate with parchment paper or a clean towel to hold the shaped onigiri.
- Dip your hands in the salted water to prevent sticking and to lightly season the rice surface.
- Scoop about 1/3 to 1/2 cup of warm rice into your palm and gently flatten it into a thick disc.
- Place about 1 to 2 teaspoons of tuna mayo filling in the center of the rice disc.
- Add a little more rice on top to cover the filling, then cup your hands and gently shape the rice into a triangle, pressing the top and corners while rotating to compact it without crushing the grains.
- Repeat with the remaining rice and filling, wetting your hands as needed so the rice does not stick.
- Lightly wet the inside of the onigiri mold with salted water.
- Fill the mold halfway with rice, press a small indentation in the center, and add a spoonful of tuna mayo filling.
- Cover with more rice to fill the mold, then place the lid on and press firmly to compact the rice.
- Release the onigiri onto the prepared tray and smooth any cracks with wet hands if necessary.
- Wrap a strip or rectangle of nori around the bottom or side of each onigiri, pressing gently so it adheres to the rice.
- Sprinkle sesame seeds or furikake over the outside if desired.
- Serve the tuna mayo onigiri at room temperature or slightly warm, or pack them in a lunchbox and enjoy within a few hours.
Notes
Approximate per onigiri (1 of 8): 210 calories; fat 7 g; saturated fat 1.5 g; carbohydrates 27 g; fiber 1 g; sugars 1 g; protein 10 g; sodium 380 mg. Values will vary based on brands, exact tuna and mayo used, and portion size. Storage
Keep at cool room temperature for up to 4 hours. For longer storage, wrap each onigiri tightly in plastic wrap, place in an airtight container, and refrigerate for up to 2 days, noting the rice will firm up. For freezing, wrap individually in plastic, place in a freezer bag, and freeze for up to 1 month without nori. Thaw in the refrigerator and reheat gently in the microwave under a damp paper towel, then add fresh nori before eating.