
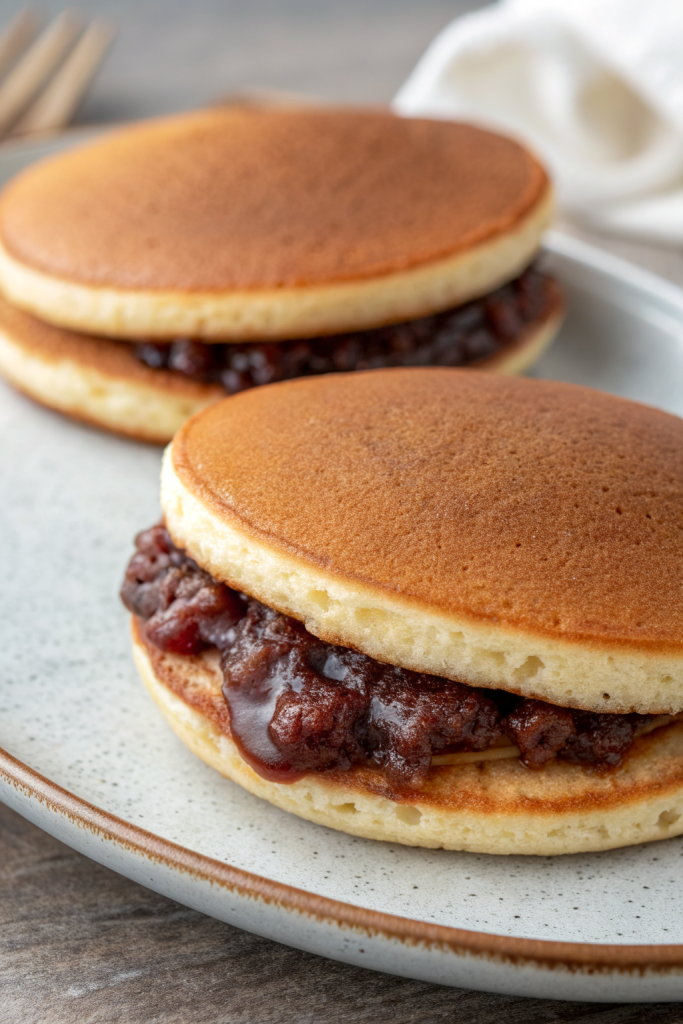
Dorayaki Japanese Red Bean Pancakes Recipe tastes like fluffy honey-kissed pancakes hugging a sweet, earthy red bean filling, soft enough to eat with your fingers but rich enough to feel like dessert. It suits anyone who loves Japanese desserts, wants a fun weekend project, and has about 45 minutes to spare from start to finish. I first made dorayaki after binge-watching anime on a rainy Sunday, and they have lived in my kitchen rotation ever since.
Why Make This Dorayaki Japanese Red Bean Pancakes Recipe at Home
Homemade dorayaki pancakes stay extra soft, taste fresher, and cost less than store bought ones. You also control sweetness, texture, and filling, so you can tweak them for kids, guests, or your own late night snack cravings.
You also skip additives and adjust the portion size easily. Once you learn the batter texture and pan heat, you cook a batch faster than a grocery run.
These homemade Dorayaki Japanese Red Bean Pancakes taste softer, fresher, and more nostalgic than any store version I tried ★★★★★
Ingredients You Need
Dry ingredients
- 1 cup all purpose flour, spooned and leveled
- 1 teaspoon baking powder
- 2 tablespoons granulated sugar
- 1 pinch fine sea salt
You can use cake flour for a slightly lighter crumb. I do not recommend bread flour, since extra gluten makes the pancakes chewy instead of tender.
Wet ingredients
- 2 large eggs, room temperature
- 3 tablespoons honey (traditional flavor and color)
- 2 tablespoons granulated sugar
- 2 tablespoons water or milk, plus 1 to 2 extra tablespoons as needed
- 1 teaspoon neutral oil (canola, sunflower, or grapeseed)
- 1 teaspoon vanilla extract (optional but tasty)
Honey gives dorayaki that classic golden color and gentle floral sweetness. If you swap honey with maple syrup, reduce the extra water slightly because maple thins the batter more.
Filling
- 1 to 1½ cups sweet red bean paste (anko)
You can use:
- Tsubuan: chunky red bean paste with bits of skin and beans.
- Koshian: smooth red bean paste, silkier and more dessert like.
I often buy canned anko from Japanese or Asian markets. Brands like Shirakiku or Morinaga keep flavor consistent and save time, but you can use homemade anko if you already have it.
Oil and cooking
- Neutral oil or nonstick spray, used very lightly for the pan
- A small piece of folded paper towel to wipe excess oil
Equipment
- Medium mixing bowl
- Small mixing bowl
- Fine mesh sieve (for flour)
- Whisk
- Rubber spatula
- Nonstick skillet or griddle
- Small ladle or 2 tablespoon cookie scoop
- Cooling rack
- Plastic wrap or clean kitchen towel
Tips & Mistakes
- Whisk eggs and sugar until slightly pale to help the pancakes turn fluffy.
- Sift flour and baking powder to avoid lumps and heavy texture.
- Rest the batter 10 to 15 minutes so the flour hydrates and bubbles settle.
- Keep the batter thick but pourable; add water or milk 1 teaspoon at a time if it looks too stiff.
- Use low to medium low heat; high heat burns the surface before the center cooks.
- Lightly oil the pan, then wipe almost all of it off; too much oil prevents the signature even browning.
- Use a small scoop for uniform size so the pancakes match when you sandwich them.
- Flip when bubbles appear across the surface and the edges look slightly dry, not earlier.
- Do not press the pancakes while they cook; pressing squeezes out air and makes them dense.
- Cool pancakes slightly before filling so the red bean paste does not melt and slide out.
- Seal the edges gently so the filling stays inside and the pancakes hold a neat shape.
- Wrap leftover dorayaki so they do not dry out, since exposed edges harden quickly in the fridge.
How to Make Dorayaki Japanese Red Bean Pancakes Recipe
Step 1: Mix the egg base
Crack the eggs into a medium bowl and add honey and sugar. Whisk until the mixture turns slightly pale and looks smooth. Add vanilla extract if you use it and whisk again.
Step 2: Add dry ingredients
Place a fine mesh sieve over the bowl and sift in flour, baking powder, and salt. Whisk gently until the batter looks mostly smooth, then switch to a spatula to scrape the sides and bottom. You want no dry pockets but you also want to avoid over mixing.
Step 3: Adjust consistency and rest the batter
Stir in 2 tablespoons of water or milk and the teaspoon of neutral oil. Check the texture; it should look thicker than regular pancake batter but still flow slowly from the spoon. Add extra water or milk 1 teaspoon at a time if it looks too thick, then cover the bowl and let the batter rest 10 to 15 minutes.
Step 4: Heat and prep the pan
Set a nonstick skillet over low to medium low heat. Add a few drops of oil, then wipe the pan with a folded paper towel so only a thin film remains. Keep that oiled towel nearby so you can wipe the pan lightly between batches.
Step 5: Cook the dorayaki pancakes
Scoop about 2 tablespoons of batter onto the warm skillet for each pancake. Hold the ladle close to the surface and pour in one spot so the batter spreads into a neat circle. Cook until small bubbles appear across the surface and the top looks slightly matte, about 1½ to 2 minutes.
Slide a thin spatula under the pancake and flip it in one quick motion. Cook the second side about 30 to 45 seconds, until it turns lightly golden. Transfer to a cooling rack and cover loosely with a clean kitchen towel while you cook the rest.
Step 6: Fill with red bean paste
Let the pancakes cool until just warm to the touch. Place one pancake darker side up, then spread 1 to 2 tablespoons of red bean paste in the center, leaving a small border around the edge. Top with a second pancake, darker side down, and press gently around the edges to seal and push the filling toward the center.
Repeat with the remaining pancakes and filling. If you plan to pack them for lunch boxes, wrap each dorayaki in plastic wrap while still slightly warm so they stay soft. Serve at room temperature for the best texture.
Variations I've Tried
I sometimes mix a spoonful of whipped cream with the red bean paste for a lighter, creamier filling. Matcha powder also works well; add 1 to 2 teaspoons to the dry ingredients for green tea dorayaki with a faint bitterness that balances the sweet anko. Chocolate lovers can tuck a few dark chocolate chips into the filling, which soften from the warmth of the pancakes.
Fruit fillings taste great too. I like to add thinly sliced strawberries or banana on top of the red bean paste for a fresh twist. Kids often enjoy a half and half filling with anko on one side and a little nut butter on the other.
How to Serve Dorayaki Japanese Red Bean Pancakes Recipe
Serve dorayaki slightly warm or at room temperature so the pancakes stay soft and the filling tastes sweet but not heavy. Pair them with green tea, roasted barley tea, iced matcha latte, or simple milk. They work as a snack, dessert, or even a fun breakfast treat.
You can pack them in lunch boxes or picnic baskets since they travel well and do not need utensils. I also like to cut them in half for party platters so guests can see the red bean center.
How to store
- Room temperature: Keep freshly made dorayaki at cool room temperature in an airtight container up to 1 day.
- Refrigerator: Store wrapped dorayaki in the fridge up to 3 to 4 days; bring them back to room temperature before eating so the pancakes soften again.
- Freezer: Wrap each dorayaki tightly in plastic, then place in a freezer bag and freeze up to 1 month.
- Reheating: Warm chilled or thawed dorayaki briefly in the microwave at low power for 10 to 15 seconds or in a covered skillet over very low heat, just until soft and slightly warm, not hot.
Dorayaki Japanese Red Bean Pancakes Recipe
Ingredients
Instructions
- Crack the eggs into a medium mixing bowl. Add honey and 2 tablespoons of sugar, then whisk until the mixture turns slightly pale and looks smooth. Whisk in the vanilla extract if using.
- Place a fine mesh sieve over the bowl and sift in the flour, baking powder, and salt. Whisk gently until mostly smooth, then switch to a spatula to scrape the sides and bottom so no dry pockets remain, avoiding overmixing.
- Stir in 2 tablespoons of water or milk and the teaspoon of neutral oil. The batter should be thicker than regular pancake batter yet slowly pourable. If it seems too thick, add more water or milk 1 teaspoon at a time until it flows slowly from a spoon. Cover and let the batter rest for 10–15 minutes so the flour hydrates and bubbles settle.
- Set a nonstick skillet or griddle over low to medium-low heat. Add a few drops of oil, then wipe the surface with a folded paper towel so only a thin film remains. Keep the oiled towel nearby to lightly wipe the pan between batches.
- Scoop about 2 tablespoons of batter onto the warm skillet for each pancake, holding the ladle close and pouring in one spot so the batter spreads into a neat circle. Cook until small bubbles appear across the surface and the top looks slightly matte, about 1 1/2 to 2 minutes.
- Slide a thin spatula under the pancake and flip in one quick motion. Cook the second side for 30–45 seconds, until lightly golden. Do not press down on the pancakes. Transfer to a cooling rack and cover loosely with a clean kitchen towel while you cook the remaining batter.
- Let the pancakes cool until just warm. Place one pancake darker side up and spread 1–2 tablespoons of red bean paste in the center, leaving a small border around the edge. Top with a second pancake, darker side down, and press gently around the edges to seal and push the filling toward the center.
- Repeat with the remaining pancakes and red bean paste. Serve slightly warm or at room temperature, or wrap each dorayaki in plastic wrap while still a bit warm to keep them soft.
Notes
Approximate per dorayaki (1 of 8): 210 calories; fat 4 g; saturated fat 1 g; carbohydrates 38 g; fiber 1 g; sugars 22 g; protein 6 g; sodium 130 mg. Values will vary based on brands, exact amount of red bean paste, and portion size. Storage: Keep at cool room temperature up to 1 day, refrigerate wrapped 3–4 days, or freeze up to 1 month. Bring to room temperature before serving for best texture.