

Grilled Cheese Burrito Recipe tastes like a grilled cheese sandwich and a cheesy burrito had a very delicious, slightly messy baby. It works for busy weeknights, picky eaters, and anyone who wants serious comfort food in about 30 minutes. I tested versions of this for my own late-night cravings, so you can skip the trial-and-error and go straight to the good stuff.
Why Grilled Cheese Burrito Recipe Is Worth It
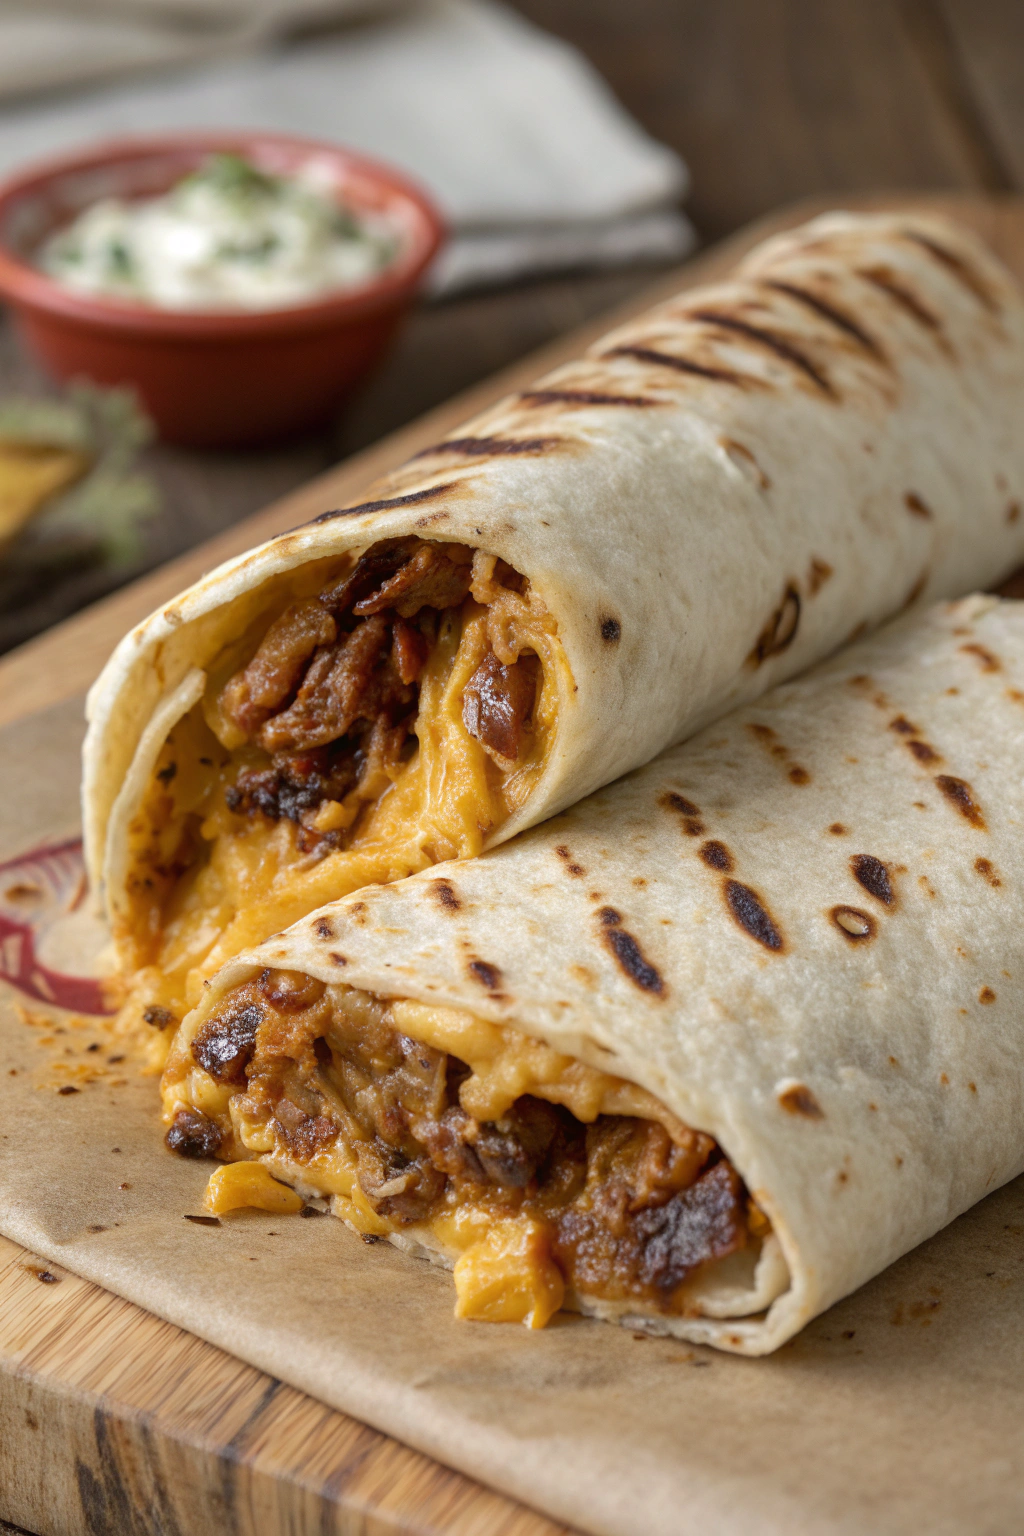
This grilled cheese burrito hits every comfort note: buttery tortilla, crispy golden cheese on the outside, and a molten, cheesy, saucy filling inside. The texture feels like a mash-up of a quesadilla, a grilled cheese, and a burrito, which checks a lot of boxes in one bite. Kids love it, adults inhale it, and nobody complains about dinner.
You only need simple pantry ingredients and one skillet, so cleanup stays easy. The recipe works with leftover taco meat, rotisserie chicken, or even just beans and rice. You can scale it for one person or a hungry crowd without any drama.
“This Easy Grilled Cheese Burrito Recipe tastes like drive-thru comfort food but fresher and way cheesier. The tortilla turns crisp and buttery, the cheese stretches with every bite, and the filling hits that perfect cozy, saucy, cheesy balance. It feels indulgent, but it comes together faster than takeout.”
Ingredients You Need
Here is everything you need for one large, hearty Grilled Cheese Burrito Recipe, with notes to help you swap and adjust.
burrito filling
- 1 tablespoon neutral oil (canola, vegetable, or avocado oil)
- 1/3 cup finely chopped onion (yellow or white)
- 1 small bell pepper, diced (any color)
- 1 small jalapeño, seeded and minced (optional for heat)
- 1 cup cooked protein:
- Seasoned ground beef, shredded rotisserie chicken, cooked ground turkey, or crumbled plant-based meat all work well
- 1/2 cup cooked rice (white, brown, or leftover cilantro-lime rice)
- 1/3 cup canned black beans, rinsed and drained
- 1/3 cup canned corn, drained (frozen corn works too; thaw first)
- 1/3 cup salsa or taco sauce (choose mild, medium, or hot based on your heat preference)
- 1 teaspoon chili powder
- 1/2 teaspoon ground cumin
- 1/4 teaspoon smoked paprika (optional, but adds nice depth)
- 1/4 teaspoon garlic powder
- Salt and black pepper to taste
cheesy burrito assembly
- 1 large burrito-size flour tortilla (10-inch; use a sturdy brand so it does not tear)
- 1 cup shredded cheese total, divided:
- Use a mix of cheddar, Monterey Jack, or a Mexican blend for best melt
- Pre-shredded cheese works fine and saves time, but fresh-shredded melts a bit smoother
- 2 tablespoons sour cream or Greek yogurt
- 2 tablespoons warm queso or nacho cheese sauce (optional but very tasty)
grilling the outside
- 1 tablespoon butter, softened (or use mayo for a super crisp exterior)
- 1–2 tablespoons extra shredded cheese for the outside crust on each side
Optional toppings and dips
- Extra salsa or pico de gallo
- Guacamole or sliced avocado
- Extra sour cream or Greek yogurt
- Shredded lettuce
- Hot sauce
Equipment list
- Large nonstick skillet or cast-iron skillet
- Spatula (a wide one helps flip the burrito easily)
- Small mixing bowl
- Cutting board and knife
- Measuring cups and spoons
Quick Tips & substitutions
- Use leftover taco meat, rotisserie chicken, or cooked ground turkey to cut prep time.
- Swap the rice for cauliflower rice if you want a lighter, lower-carb filling.
- Use refried beans instead of whole beans if you prefer a creamier texture.
- Choose a sturdy flour tortilla; thin tortillas tear and leak cheese.
- Warm the tortilla for 10–15 seconds in the microwave so it folds without cracking.
- Use a mix of cheeses for best flavor and melt; cheddar plus Monterey Jack works great.
- Spread a thin layer of mayo on the outside instead of butter if you want extra crispness.
- Use Greek yogurt instead of sour cream for a little extra protein.
- Skip the jalapeño and use mild salsa if you cook for kids or heat-sensitive eaters.
- Add a spoonful of cream cheese to the filling if you want a richer, ultra-creamy center.
How to Make Grilled Cheese Burrito
Step 1: Sauté veggies and aromatics
Heat oil in a large skillet over medium heat. Add the chopped onion and bell pepper and cook until they soften and turn slightly golden, about 5–7 minutes. Stir in the jalapeño and cook 1–2 minutes more so it softens and loses its raw bite. Season lightly with salt and pepper.
Step 2: Build the filling
Add your cooked protein to the skillet and stir to combine with the veggies. Sprinkle in chili powder, cumin, smoked paprika, and garlic powder, then stir until everything looks evenly coated. Add the rice, black beans, and corn, then pour in the salsa or taco sauce. Stir and cook 2–3 minutes until the mixture thickens slightly and tastes well seasoned; adjust salt and pepper as needed, then turn off the heat.
Step 3: Prep the tortilla and cheese
Place the warm tortilla on a cutting board. Spread the sour cream (or Greek yogurt) in a line across the center of the tortilla, leaving a border at the edges. Spoon about 1/2 cup of shredded cheese over the sour cream line. Add a generous scoop of the warm filling on top of the cheese, then drizzle with warm queso or nacho cheese sauce if you use it.
Step 4: Roll the burrito tightly
Fold the sides of the tortilla inward over the filling. Fold the bottom edge up and over the filling, then roll tightly toward the top edge to form a snug burrito. Tuck in any stray filling as you roll so it stays neat and sealed. Set the burrito seam-side down while you prep the skillet.
Step 5: Build the grilled cheese crust
Wipe out the skillet if needed, then place it back over medium heat. Spread half the butter (or mayo) in a thin layer in the skillet, then sprinkle 1–2 tablespoons of shredded cheese directly over the butter in a rough rectangle about the size of the burrito. Place the burrito seam-side down on top of the cheese bed and press gently with a spatula so the cheese sticks to the tortilla.
Step 6: Grill the first side
Cook the burrito for 3–4 minutes, until the cheese under it melts and turns golden and crisp and the tortilla browns. Lift one edge with the spatula to check the color; you want a deep golden crust, not pale. When it looks crisp and the cheese sets, carefully lift the burrito out of the skillet.
Step 7: Grill the second side
Add the remaining butter (or mayo) to the skillet and sprinkle in another layer of shredded cheese in a rectangle. Flip the burrito so the un-grilled side faces down onto the fresh cheese. Cook another 3–4 minutes until the second side turns golden and crisp and the cheese forms a crust.
Step 8: Rest, slice, and serve
Transfer the grilled cheese burrito to a cutting board and let it rest 1–2 minutes so the filling settles slightly. Slice it in half with a sharp knife for that very satisfying cheesy cross-section. Serve hot with salsa, guacamole, extra sour cream, and any toppings you like.
Recipe Variations
This Grilled Cheese Burrito Recipe adapts easily to different diets and cravings.
- Gluten-free: Use a large gluten-free tortilla and check that your salsa and seasonings list gluten-free on the label.
- Vegan: Use plant-based meat or seasoned lentils, vegan cheese shreds, and dairy-free sour cream or cashew cream.
- Low carb: Swap rice for cauliflower rice and go heavier on protein and veggies; use a low-carb tortilla.
- Extra protein: Add more beans or double the meat and use a bit less rice.
- Spicy version: Use hot salsa, add more jalapeño, and finish with a drizzle of your favorite hot sauce.
- Breakfast twist: Fill with scrambled eggs, breakfast sausage or bacon, potatoes, and cheese, then grill the outside the same way.
- Veggie-packed: Add sautéed zucchini, mushrooms, or spinach to the filling for more vegetables.
Ways to Serve Grilled Cheese Burrito
This cheesy burrito stands strong on its own, but a few simple sides turn it into a full meal.
- Serve with a side of tortilla chips and salsa or pico de gallo.
- Add a simple salad with lettuce, tomato, cucumber, and a limey dressing.
- Pair with Mexican-style rice or cilantro-lime rice if you want a heartier plate.
- Offer a side of seasoned black beans or refried beans for extra protein and fiber.
- Serve with sliced fresh fruit like mango, pineapple, or orange segments for a bright contrast.
Storage Success
Let the Grilled Cheese Burrito Recipe cool to room temperature before you store it, so condensation does not make the tortilla soggy. Wrap each burrito tightly in foil or plastic wrap, then place it in an airtight container and refrigerate for up to 3 days. Reheat in a skillet over medium heat so the outside crisps again and the cheese melts, or use an air fryer for 5–7 minutes at 350°F. Freeze tightly wrapped burritos for up to 2 months and reheat from frozen in a covered skillet or air fryer, adding a few extra minutes so the center heats through.
Easy Grilled Cheese Burrito Recipe
Ingredients
Instructions
- If using ground beef, cook it in a skillet over medium heat until browned, 6 to 8 minutes. Drain excess fat, then stir in taco seasoning and water. Simmer for 2 to 3 minutes until thickened.
- Warm tortillas briefly in a dry skillet or microwave until pliable.
- Lay each tortilla flat. Spread a spoonful of refried beans down the center if using, then add a layer of rice, a scoop of seasoned beef, and drizzle with sour cream and salsa as desired.
- Top each tortilla with an even amount of shredded cheddar and Monterey Jack cheese.
- Fold in the sides of the tortilla, then roll up tightly into a burrito, tucking in the ends so the filling is enclosed.
- Heat butter or oil in a large skillet over medium heat. Place burritos seam-side down in the skillet.
- Cook 2 to 3 minutes per side, pressing gently with a spatula, until the tortilla is golden brown and crisp and the cheese inside is melted.
- Remove from skillet, let rest 1 to 2 minutes, then slice in half if desired and serve warm.
Notes
Approximate per serving (1 burrito, including beef, cheese, rice, beans, and toppings): 720 calories; fat 38 g; saturated fat 18 g; carbohydrates 56 g; fiber 5 g; sugars 4 g; protein 34 g; sodium 1540 mg. Values will vary based on ingredient brands, optional add-ins, and portion size.
Leave a Reply