

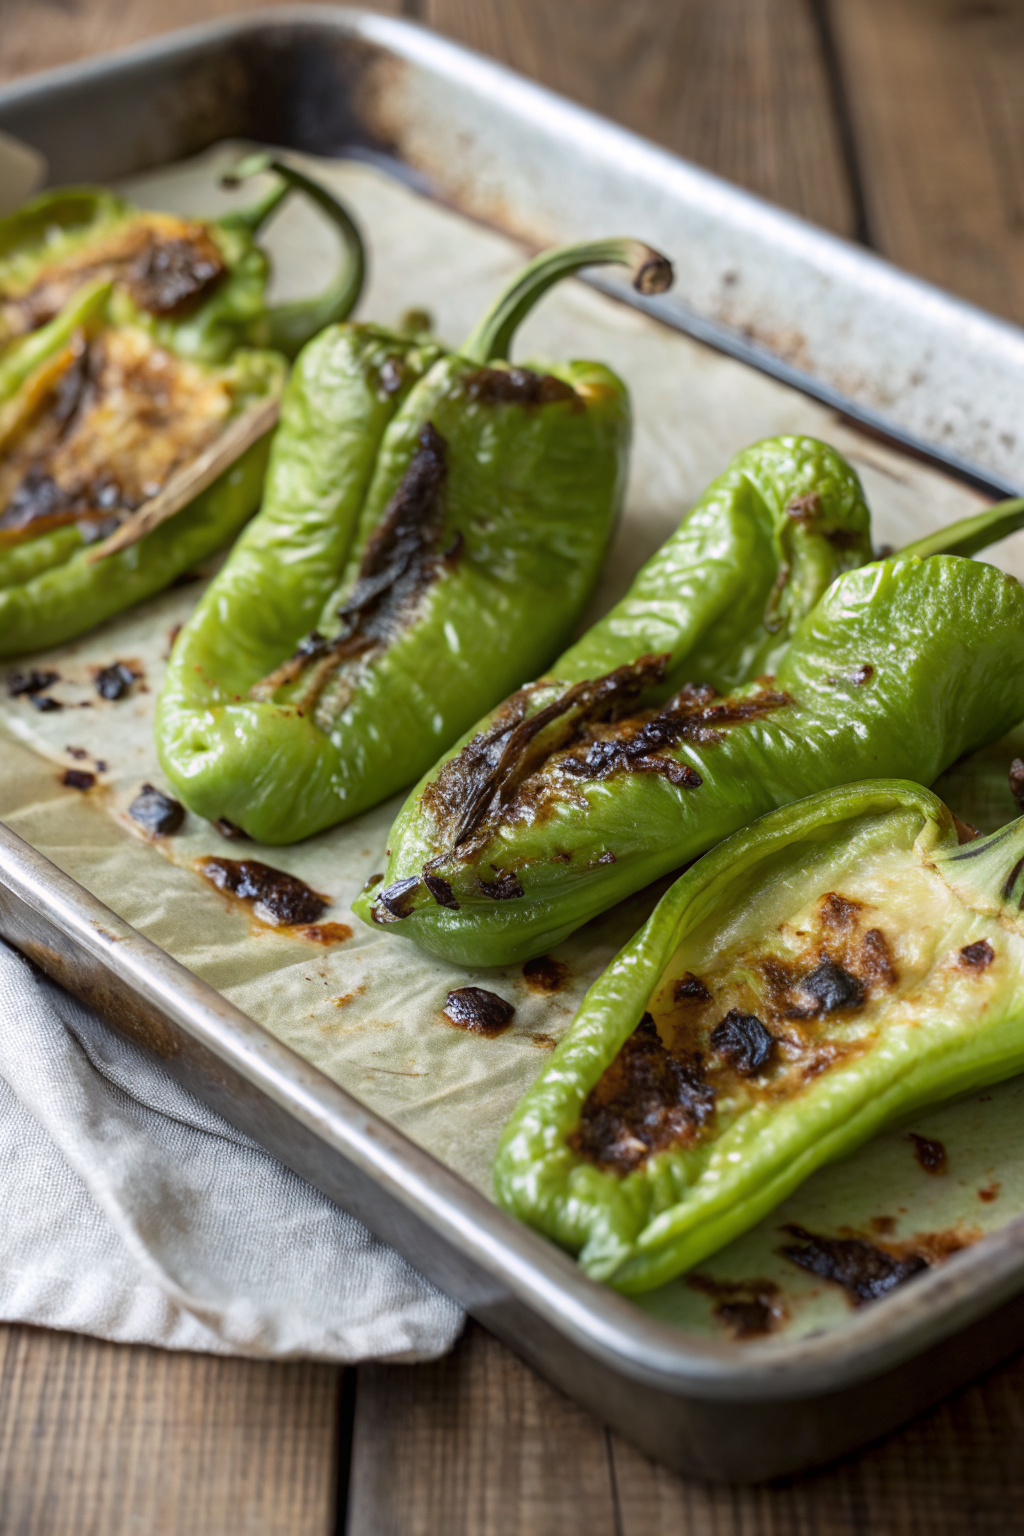
How to Roast Hatch Chile in the Oven tastes smoky, a little earthy, and as mild or fiery as you choose, with soft flesh and blistered, flavorful skin. It works perfectly for home cooks who want big flavor in under 45 minutes, from prep to cleanup. I roast a double batch every August, then sneak them into everything from eggs to mac and cheese like a proud chile-obsessed parent.
Why You Should Try This Roast Hatch Chile in the Oven
Roasting Hatch chiles in the oven gives you that classic smoky flavor without any fancy gear. You control the heat level, so mild fans and spice chasers both stay happy. You also stock your freezer with flavor bombs that upgrade tacos, burgers, soups, and even grilled cheese.
You skip the grocery store freezer bags and roast fresh, in-season Hatch chile at peak flavor. The oven method keeps things simple, clean, and repeatable, which helps if you roast several pounds at once. Your house smells incredible, and your future self thanks you every time you pull a bag from the freezer.
“This oven method gave me smoky, peelable Hatch chiles with almost no mess, and I now keep a stash in my freezer all year long. ★★★★★”
Ingredients You’ll Need
Fresh produce
- Hatch chiles, whole, fresh, firm, and glossy (any heat level: mild, medium, hot, or extra hot)
- Optional: a few poblano peppers if you want to stretch the batch or mellow the heat
Oil & seasonings
- Neutral oil with a high smoke point, such as avocado oil or grapeseed oil (you can also use light olive oil, not extra virgin)
- Kosher salt, to sprinkle after roasting
- Optional: lime wedges for serving or squeezing over the peeled chiles
- Optional: garlic powder or smoked paprika, for seasoning after peeling if you plan to eat them as a side dish
Pantry shortcuts & notes
- If you only find pre-washed bagged Hatch chiles, use them as long as they feel firm and not slimy.
- If your store sells “Hatch-style” green chiles, you can still roast them with this same method, though flavor might taste slightly different from true New Mexico Hatch chile.
- Canned Hatch green chiles work nicely in recipes, but they will not replace the flavor and texture of fresh roasted Hatch chile in the oven.
Equipment
- Large rimmed baking sheet (a half sheet pan works best)
- Wire rack that fits inside the baking sheet (helps with even blistering, but you can skip it)
- Aluminum foil or parchment paper (foil handles high heat better)
- Tongs with a good grip
- Large bowl for steaming
- Large plate or cutting board
- Plastic wrap, a tight-fitting lid, or a large reusable silicone bag for steaming
- Knife and cutting board for seeding and chopping
- Disposable gloves if you use medium, hot, or extra hot Hatch chile
Tips & Tricks
- Preheat the oven fully so the chiles blister quickly and keep a tender interior.
- Dry the Hatch chiles very well after rinsing so they char instead of steam.
- Line the baking sheet with foil for easier cleanup and less stuck skin.
- Use a wire rack if you want more even blistering on all sides.
- Space the chiles in a single layer so they roast instead of stew.
- Turn the chiles every few minutes so the skins blister all around.
- Wear gloves when handling hot Hatch chile varieties and avoid touching your face.
- Let the chiles steam in a covered bowl so the skins slip off easily.
- Peel gently and keep the flesh intact if you want whole chiles for stuffing.
- Leave some seeds in if you like more heat, or scrape them all out for a milder batch.
- Roast extra Hatch chile and freeze them flat in small bags for quick use later.
- Label bags with heat level and date so you avoid spicy surprises.
How to Roast Hatch Chile in the Oven
Step 1: Prep the Hatch chiles and pan
Rinse the Hatch chiles under cool water and rub off any dirt. Dry them very well with a clean kitchen towel or paper towels so no moisture beads remain. Line a rimmed baking sheet with foil, then place a wire rack on top if you use one. Arrange the chiles in a single layer on the rack or directly on the foil.
Drizzle or brush a small amount of neutral oil over the chiles, just enough to lightly coat them. You do not need much oil, since the goal focuses on blistering the skin, not deep roasting the flesh. Preheat your oven to 450°F and let it heat completely while the chiles sit on the pan. Place an oven rack in the upper third of the oven so the heat hits the chiles more directly.
Step 2: Roast until skins blister and char
Slide the baking sheet into the oven and roast the Hatch chiles for about 6 to 8 minutes. Watch through the oven window as the skins start to puff, blister, and char in spots. Use tongs to turn each chile so every side faces the heat.
Keep roasting and turning every 3 to 5 minutes until the chiles show blistered, blackened patches on most of the surface. Total time usually lands between 15 and 20 minutes, depending on chile size and your oven. Pull any smaller chiles early if they finish sooner, so they do not burn too deeply. The kitchen should smell smoky and peppery in the best way.
Step 3: Steam the roasted Hatch chiles
Transfer the hot roasted Hatch chiles to a large bowl as soon as they come out of the oven. Cover the bowl tightly with plastic wrap, a lid, or a large plate. You can also slide them into a large silicone bag and seal it. The trapped steam loosens the skins and makes peeling much easier.
Let the chiles steam for 10 to 15 minutes. They should feel warm but not scorching when you handle them. Do not skip this step, since it saves you a lot of frustration during peeling. Use this time to clear the baking sheet and set up your cutting board and knife.
Step 4: Peel, seed, and chop
Put on gloves if you use medium or hotter Hatch chile. Take one chile at a time and gently pull off the loosened skin with your fingers. It should slip away in large pieces. If some bits cling, scrape them lightly with the edge of a knife.
Slice each chile lengthwise from stem to tip and open it like a book. Scrape out the seeds and pale ribs with a spoon or the back of your knife. Keep some seeds if you want more heat. For strips, slice the peeled chiles into long pieces, and for recipes like sauces, chop them into small pieces.
Step 5: Season and use
Taste a small piece of roasted Hatch chile so you know the heat level. Sprinkle with a little kosher salt and a squeeze of lime if you plan to serve them as a side or taco topping. If you use them in recipes, keep seasoning light at this stage so you adjust salt later in the dish.
Use the roasted Hatch chile in enchiladas, breakfast burritos, quesadillas, burgers, soups, or green chile sauce. Fold chopped chiles into scrambled eggs, stir them into queso, or layer them over grilled chicken. I also tuck them into grilled cheese with cheddar and tomato, which turns a simple sandwich into something you crave again and again.
What to Serve with Roast Hatch Chile
Roasted Hatch chile in the oven works as a flexible ingredient, so you can pair it with simple staples or full meals. Spoon it over scrambled eggs, breakfast tacos, or a skillet of potatoes for a weekend brunch. Stir it into mac and cheese, quesadillas, or bean and rice bowls for easy weeknight dinners. Serve it alongside grilled chicken, turkey burgers, or roasted vegetables, with a cold sparkling water or iced tea to balance the heat.
Storage Options
- Short-term fridge storage: Cool the roasted, peeled Hatch chiles completely, then store them in an airtight container or zip-top bag in the refrigerator for up to 5 days.
- Freezer storage: Lay the chiles flat in a single layer inside freezer bags, squeeze out extra air, label with date and heat level, and freeze for up to 6 months.
- Portioning tip: Freeze in small portions, such as 2 to 4 chile peppers per bag, so you thaw only what you need for a recipe.
- Reheating: Thaw in the fridge overnight or under cool running water in the sealed bag, then warm gently in a skillet over low heat or stir directly into hot dishes like soups, stews, and sauces.
How to Roast Hatch Chile in the Oven
Ingredients
Instructions
- Rinse the Hatch chiles under cool water, rubbing off any dirt, then dry them very well with a clean kitchen towel or paper towels so no moisture beads remain.
- Line a large rimmed baking sheet with aluminum foil. Place a wire rack on top if using, and arrange the chiles in a single layer on the rack or directly on the foil.
- Drizzle or brush a small amount of neutral oil over the chiles, just enough to lightly coat them. Preheat the oven to 450°F, positioning an oven rack in the upper third of the oven.
- Once the oven is fully preheated, slide the baking sheet into the oven and roast the Hatch chiles for 6 to 8 minutes, watching as the skins begin to puff, blister, and char in spots.
- Use tongs to turn each chile so all sides face the heat. Continue roasting and turning every 3 to 5 minutes until the chiles are blistered and blackened in patches over most of the surface, 15 to 20 minutes total, pulling any smaller chiles early if needed.
- Transfer the hot roasted chiles to a large bowl, cover tightly with plastic wrap, a lid, or a large plate, and let them steam for 10 to 15 minutes until warm but not scorching to the touch.
- Put on disposable gloves if using medium, hot, or extra hot chiles. Peel off the loosened skins with your fingers, scraping any stubborn bits lightly with the edge of a knife.
- Slice each peeled chile lengthwise from stem to tip and open it like a book. Scrape out the seeds and pale ribs with a spoon or the back of a knife, leaving some seeds if you prefer more heat.
- For strips, cut the chiles into long pieces; for recipes like sauces or fillings, chop them into small pieces as desired.
- Taste a small piece to gauge the heat level, then sprinkle the chiles lightly with kosher salt and, if serving as a side or topping, a squeeze of lime and a pinch of garlic powder or smoked paprika.
Notes
Approximate per 1/2-cup serving (about 90 g roasted Hatch chiles with a light oil coating and salt): 45 calories; fat 2 g; saturated fat 0 g; carbohydrates 7 g; fiber 2 g; sugars 4 g; protein 2 g; sodium 120 mg. Values will vary based on chile size, exact oil amount, and added seasonings. Storage: Cool roasted, peeled chiles completely, then refrigerate in an airtight container for up to 5 days or freeze flat in small, labeled bags for up to 6 months.
Leave a Reply